How to Build Drawers with Minimal Tools
We had our doubts.
Our friends had their doubts. The internet also had doubts.
But it worked! We managed to build a full set of drawers for our custom storage area with only a few simple tools and no table saw. In this post, I'll go over how we designed, prepped, built, and installed our drawers. The whole process took us 3-ish days.
Designing Drawers
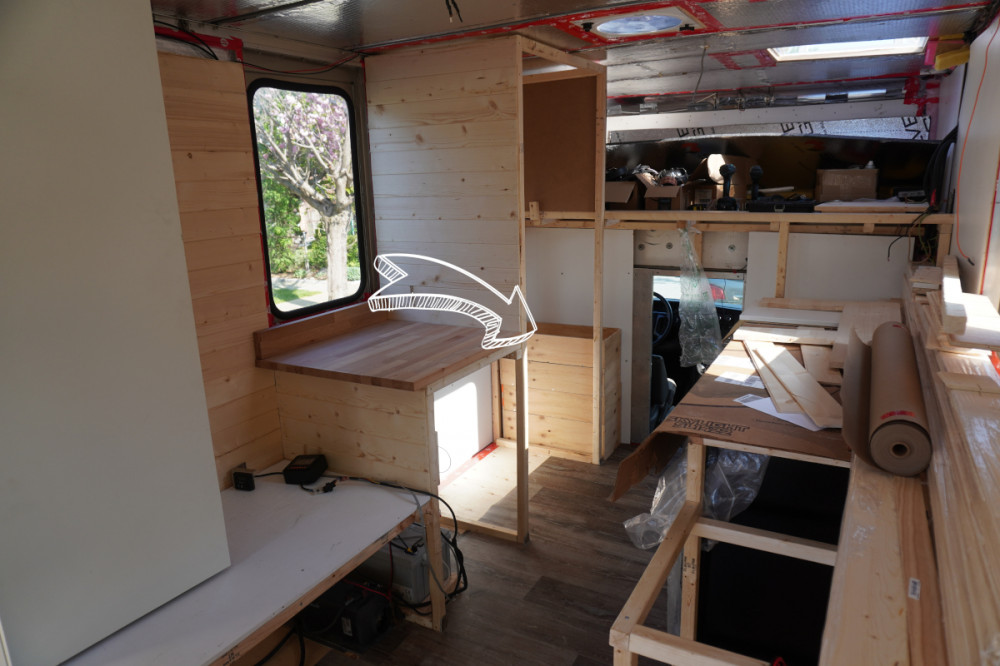
In our layout, we extended the alcove so that we could fit a twin-sized bed. We wanted to use the space beneath this extension for storage, but nothing at IKEA would fit the narrow width. The space was also quite deep at 22".
Although we had been contemplating building all the cabinetry from scratch, we had originally decided against it because we didn't have the correct tools. However, this area left us no choice but to tackle the drawers ourselves.
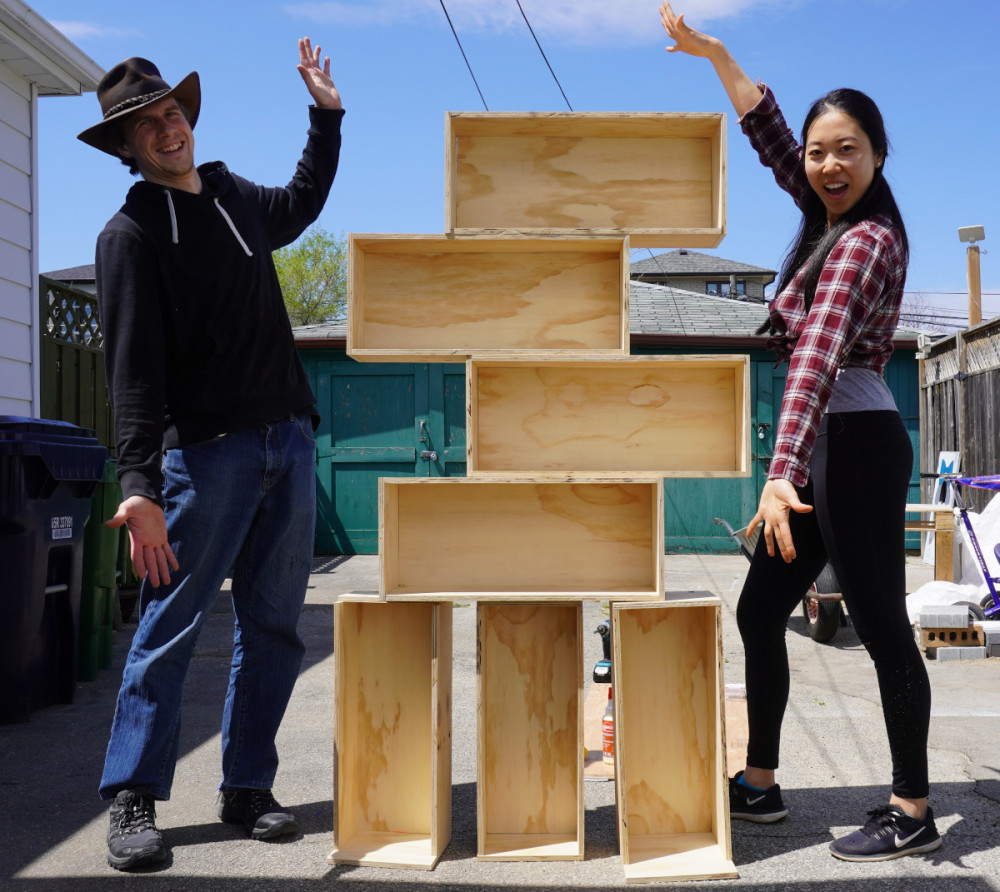
Here you'll see the built drawers stacked inside the space before we installed them.
Initial Sketches
I'm a pencil and paper kinda person, so I first sketched out the drawers by hand and noted down the dimensions.
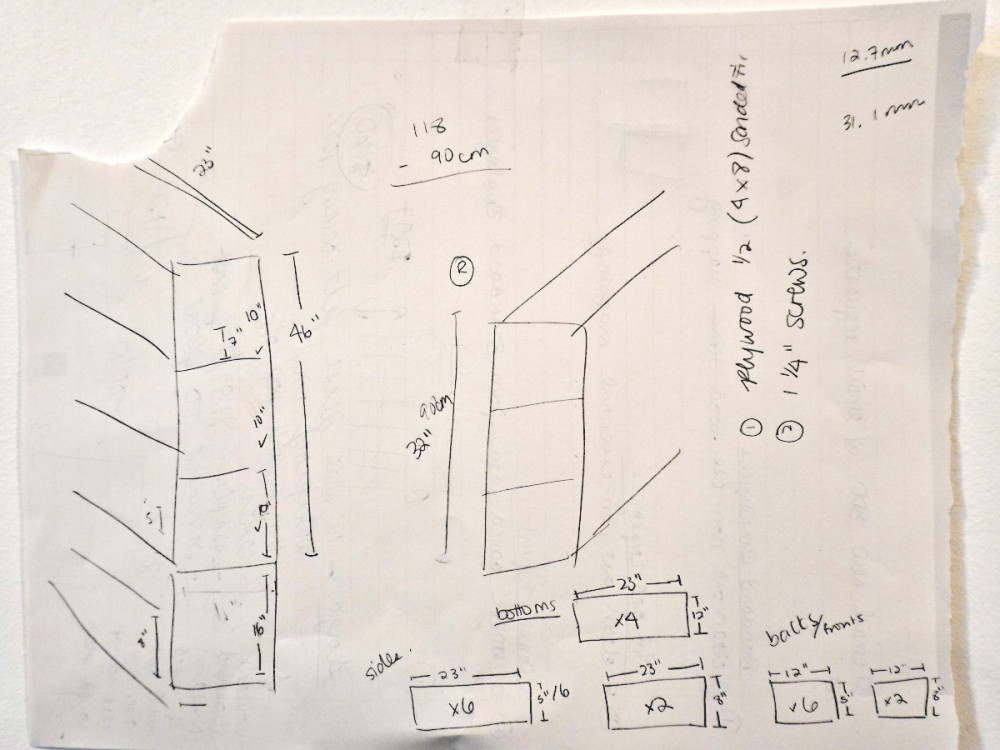
Using this, I planned out large bottom drawers and equal-sized drawers above. I'm glad we only planned two heights for the drawers as this significantly simplified cutting the wood and sorting the panels.
We based our design on typical IKEA drawers with full front panels, but shortened side and rear panels. This not only reduces the amount of plywood we'll need (and the cost), but also the weight inside our truck. Instead, we'll be using fabric boxes or dividers to organize our stuff.
Note that these panels only form the drawer BOX. We will be adding additional appearance boards on top.
The drawer themselves are four simple walls where the front and back panels overlay the edges of the side panels. Wall panels overlap edges of the bottom panel completely to allow for screws on the side for maximum rigidity.
For the drawer slides, we settled on soft-close ball-bearing ones from Amazon that were extra sturdy so that we could pull out the drawers completely without fear of them falling out or breaking our frame.
Gut-check in Tinkercad
On a whim, we decided to confirm our measurements in Tinkercad.
After watching numerous YouTube videos, we realized how meticulous we had to be when making these drawers. For example, when calculating the width of the drawer, we had to consider three things:
- The width of the space itself,
- The thickness of the plywood, and
- The gap required for the drawer slides.
In my sketches, I had estimated a margin of error of +/-2 cm. If you've built cabinets before, you'll know that this is not acceptable.
In Tinkercad, I only needed to plan out one drawer to determine the width for the rest of them.
We're glad we double-checked because we realized we had not included the thickeness of the front and back panels, which affected the size of the bottom panel. If we hadn't caught this, we would've been trimming 4 cm off seven panels on game day.
Game Day Preparation
Procuring Materials
Our bill of materials:
- 4'x8' sheet of 1/2" plywood (large enough for the total surface area of all the panels, thick enough for a screw)
- 1" wood screws (14 per drawer, so a pack of 100 screws sufficed)
- Wood glue
- Acrylic protective finish
- Premium bristle brush
- Sandpaper (any grit below #200 is fine, unless you fancy and want smooth drawers)
- Soft-close drawer slides
A short trip to Home Depot covered all of the above. Wow, we really weren't keeping an eye on the cost here. The drawer slides cost us CA$182 total. All other materials cost CA$80. Total cost was $262.
Procuring Tools
We purchased most of our tools second-hand from Kijiji, Facebook Marketplace, and local auctions. This cut down cost of our tools by 50-75%. If you have the time to plan ahead, we recommend you do the same. Of course, please practice safe social distancing and sanitize your hands after every transaction before you eat or touch your face.
Three pieces of advice when buying your tools:
- Go cordless whenever possible. Batteries nowadays are miles ahead of where they used to be. We used our Makita sander (purchased after this project) for 2 hours straight and it only chewed up 75% of our 5 Ah battery.
- Be loyal to the same brand. Since you're going cordless, you'll need batteries. Purchasing one brand means your batteries can be used across your entire arsenal of tools.
- Buy multiple batteries. We used to have three batteries, which meant we could have one in each of our drills and another in a saw. We recently added a fourth one after finding a steal on Kijiji.
The tools we used:
- Pencil
- Measuring tape
- Circular saw
- Makita drills x2
- Mitre saw
- 12" saw blade for the mitre saw
- Scrap piece of cardboard to scrape the glue
- Large drill bit for countersinking (or get a real countersink drill bit)
We recommend having two drills—one for drilling pilot holes and the other for driving in the screws.
We don't own a mitre saw, but luckily, our friends upstairs do. They kindly lent it to us and we offered to replace the saw blade for them. Otherwise, you can rent a mitre saw from Home Depot at a rate of $60 per day. You'll need this to efficiently and accurately cut your panels.
Action Plan
Next, I had to plan how to cut the sheet of plywood to minimize waste.
Moritz's new favourite saying about me is, "If all you have is a hammer, everything looks like a nail."
I whipped open Excel and started punching out a spreadsheet. One hour later, happy with my result, I showed it to Moritz, beaming that we could fit every panel on the plywood AND minimize the number of cuts we have to make!
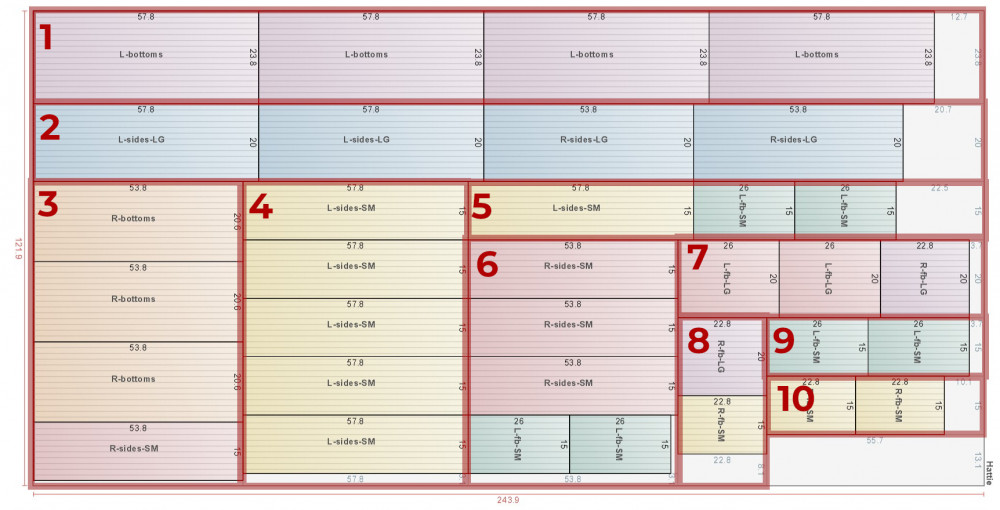
Turns out, there is a nifty and FREE website called Cut List Optimizer where you input the dimensions of your stock sheet (the plywood) and the panels and it will optimize your cuts for you. It will even account for the direction of the grain. Even my human brain and spreadsheet was not this sophisticated. My mind was blown.
Here's what our final cut sheet looked like marked up with cuts we made using the circular saw. This cut sheet ABSOLUTELY saved us.
Cutting and Prepping the Panels
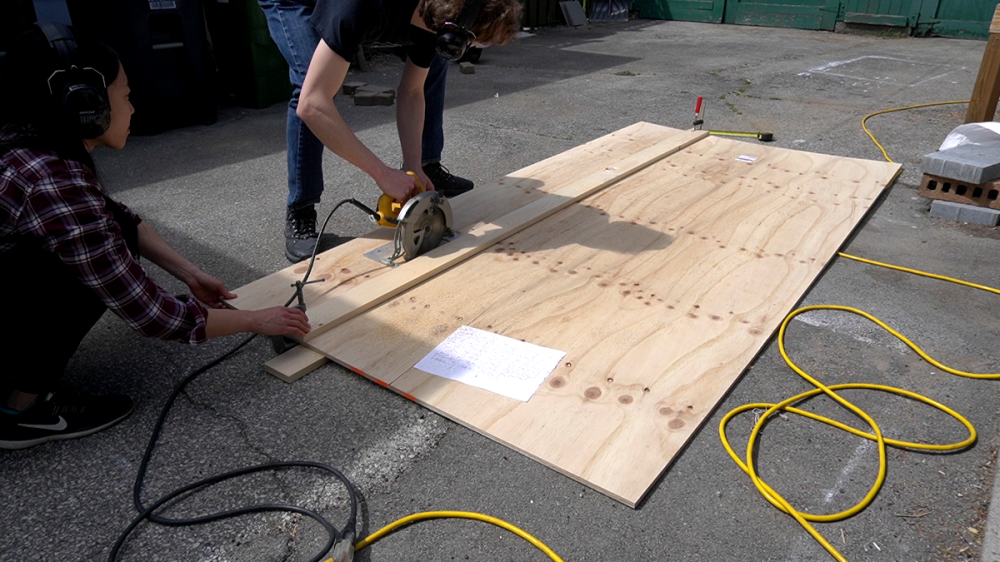
Game day was upon us. Since we had a mitre saw and not a table saw, we first cut the stock sheet into manageable widths using the circular saw.
Moritz manned the mitre saw because I was too afraid to go near it without the guard. Since the mitre saw chews off about 2 mm of wood, we had to measure, cut, then continue measuring, as opposed to measure everything all out at once. We got into a good rhythm where I was measuring and sorting the panels while he cut the wood.
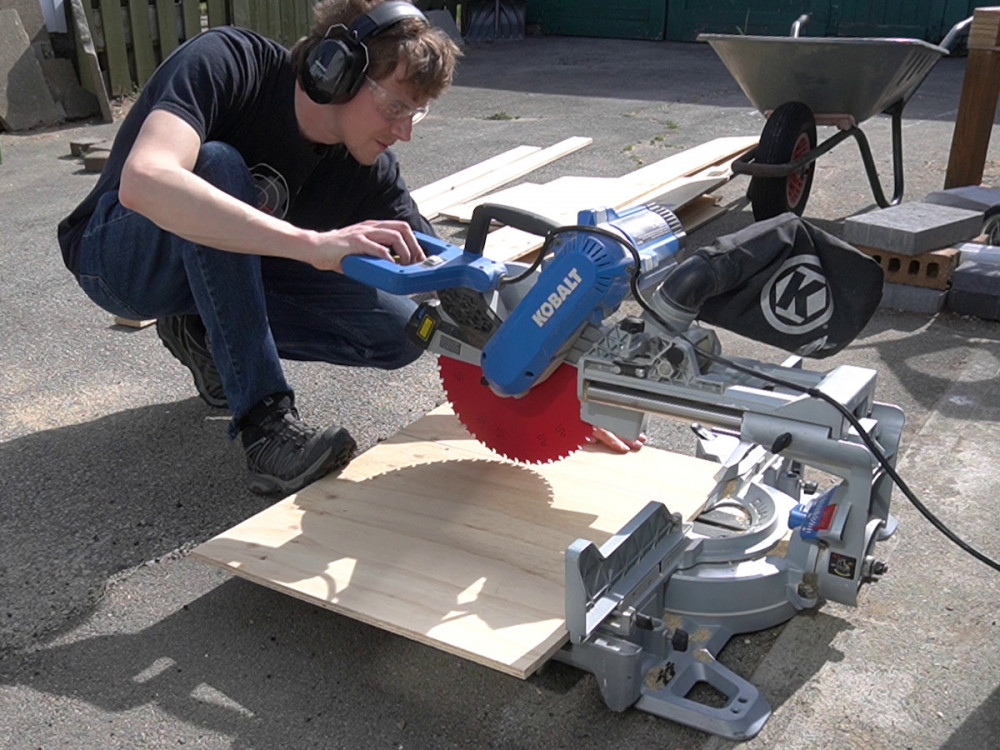
This entire process took us about 6 hours. If you're not fussing with video footage, it would likely take 4 hours.
Assembling the Drawers
We assembled our first few drawers by building the four walls, then somehow jamming in the bottom panel. Not recommended.
Do this instead. You'll need four hands or a friend or some clamps.
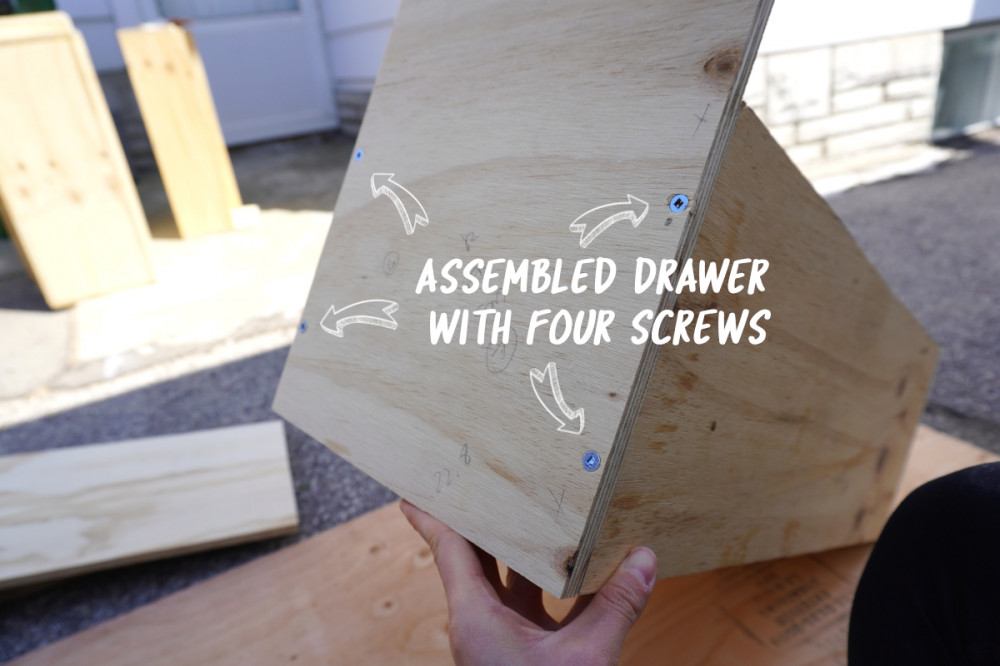
1. Final product of assembled drawer with screws. We only needed four screws on each corner of the front and rear panels, then three along each edge of the bottom panel.
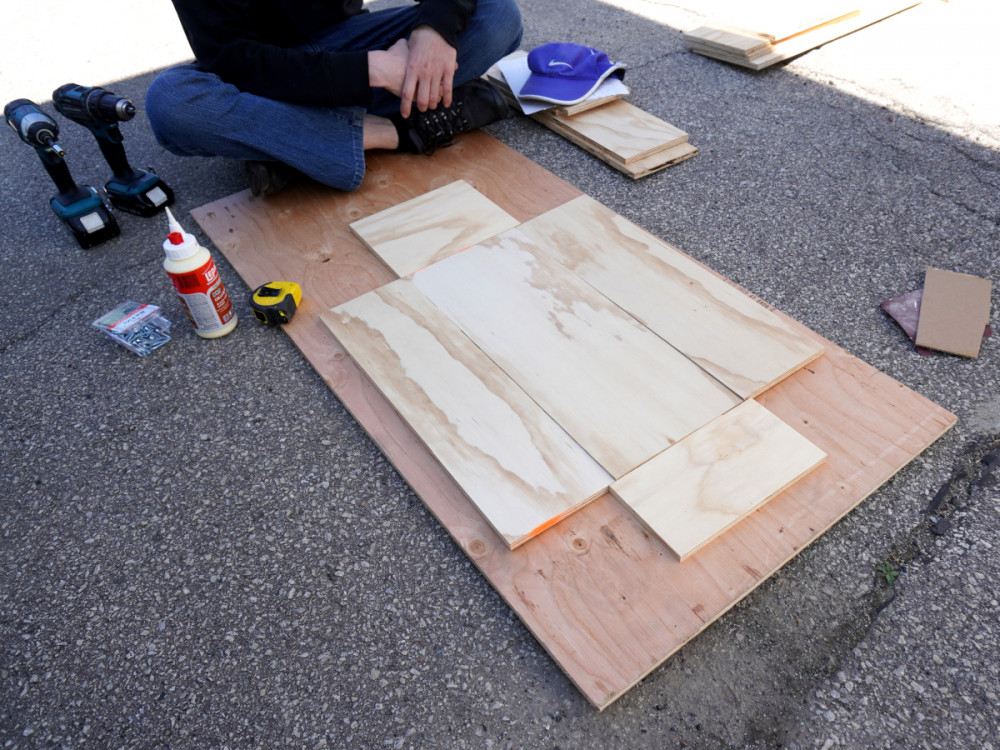
2. Set your "mis en place." Arrange the panels by laying the "wall" panels at their corresponding edge relative to the bottom panel. Gather your tools. Preparing your workspace helps you work faster.
3. Position your first corner. Start by standing up the front and side panels and holding them against the bottom panel. The bottom panel acts as a guide to ensure your corners are right angles.
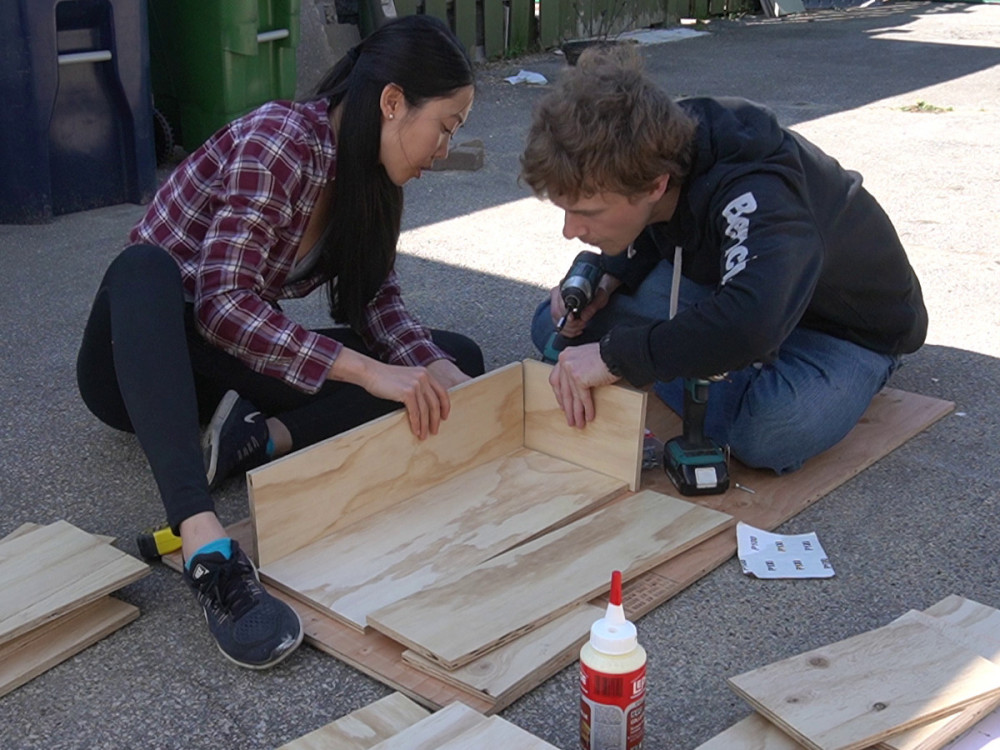
3. Drill pilot hole for screw #1 and insert a screw. Drill a hole going through the front panel into the side panel near the top. Insert a screw temporarily to hold the panel in place so your second pilot hole is aligned.
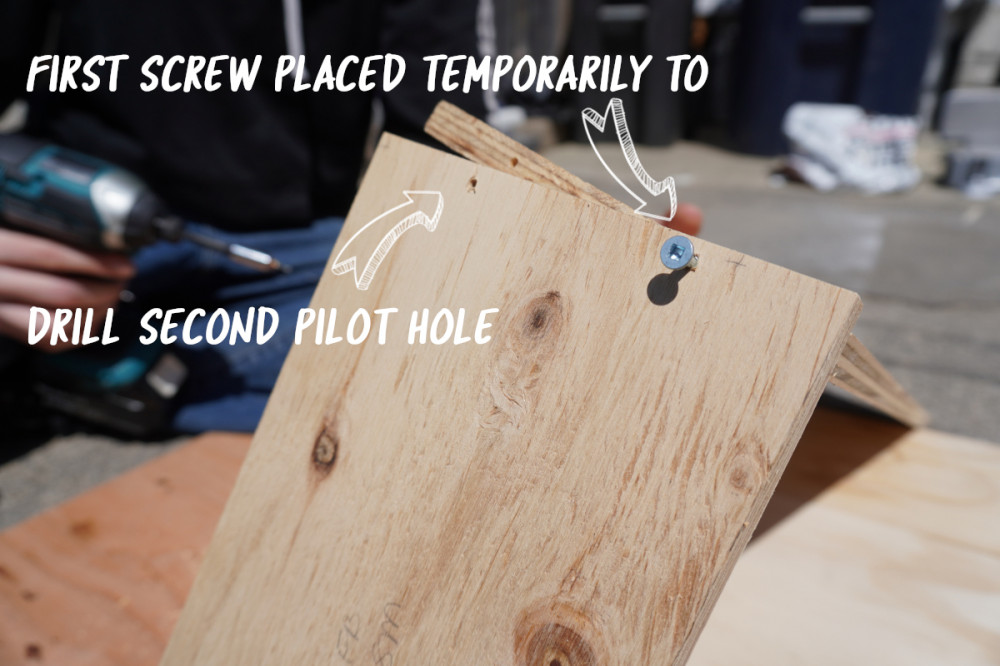
4. Drill pilot hole for screw #2. Drill a second hole near the bottom of the front panel. Now that you have two holes that are aligned, remove the first screw.
5. Countersink and glue. While one person applies and spreads the glue to the seam of the side panel, the other person prepares a countersink for the hole.
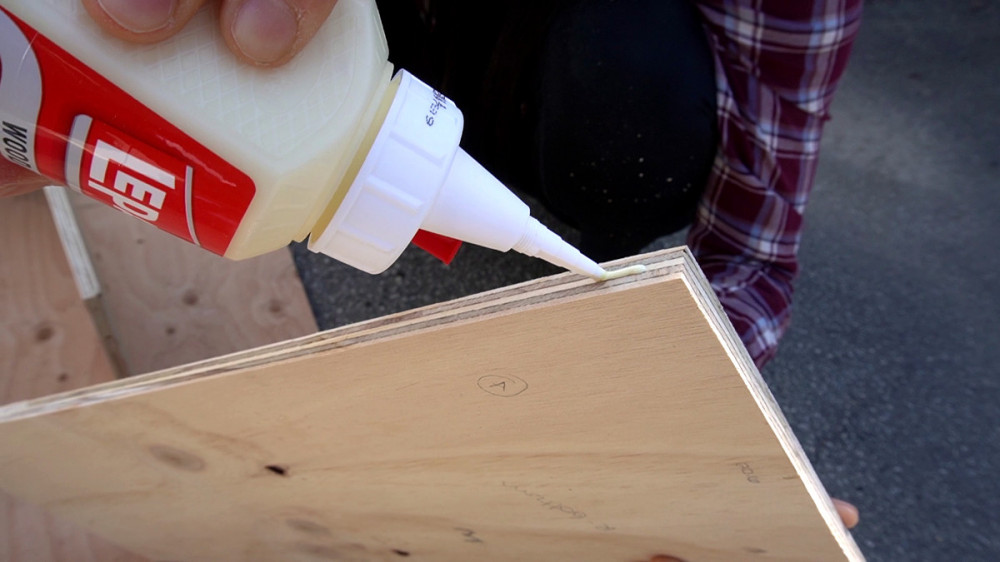
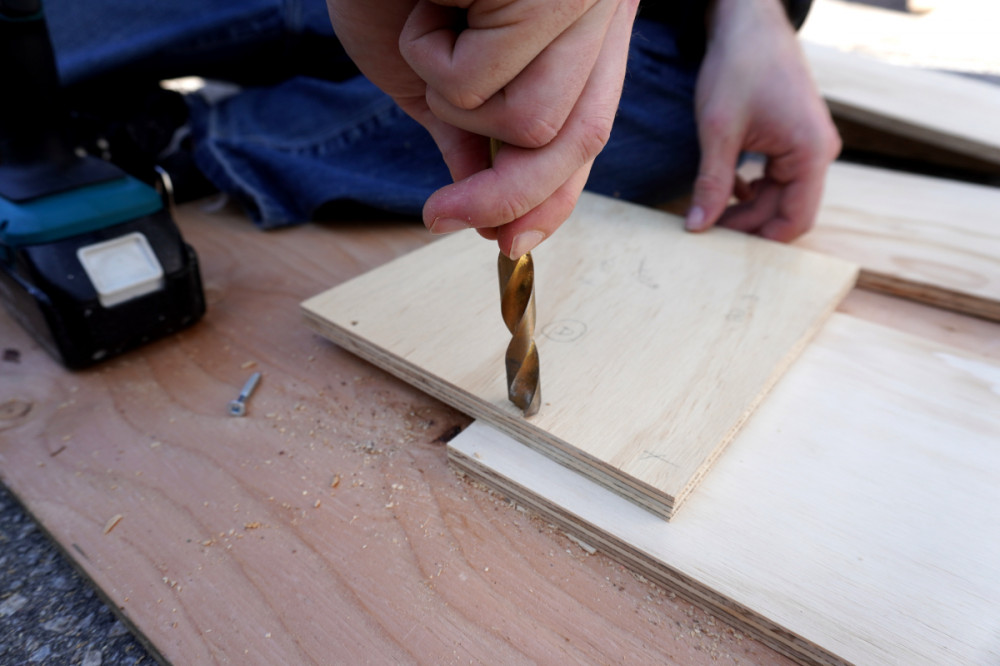
6. Attach front and side panels together. Insert both screws partway through the front panel to act as guides into the pilot holes. Tighten the screws.
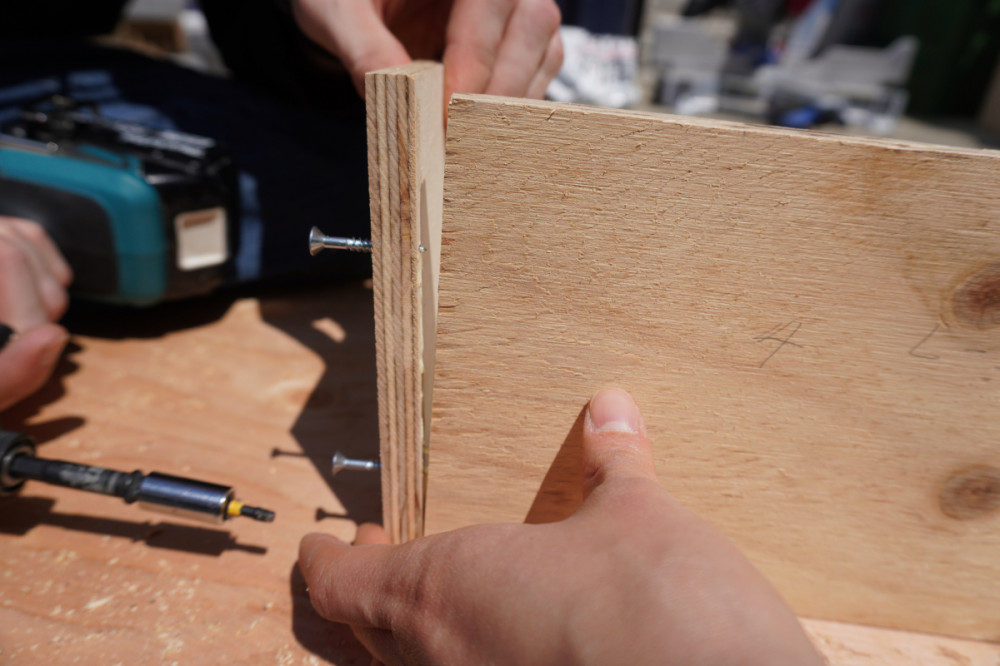
7. Rinse and repeat for the other side! Repeat steps 2-6 on the opposite side panel.
8. Drill pilot holes for the back panel. Make sure you press the final wall against and around the bottom panel tightly before drilling the pilot holes. This time, drill both the top ones, affix with a screw temporarily, then drill the bottom pilot holes.
9. Remove both screws to countersink and glue. One person creates the four countersinks while another applies and spreads wood glue to all four edges of the bottom panel, plus the two vertical edges of the side panels which will press against the face of the back panel.
10. Attach the back panel. Insert the four screws to attach the back panel to the side panel. At this point, the bottom panel is glued into the four walls of the drawer, but not attached.
11. Secure the bottom panel. The final step is to perma-fix the bottom panel into the four walls. Insert as many screws as you feel necessary. We drilled pilot holes and inserted 3 screws along each side.
Our final inspection by measuring corner to corner diagonally showed that our drawer boxes were not perfect (the first cuts made by the circular saw caused this) and were off by 4 mm max. We weren't sure if this was good enough, but it ended up working out okay.
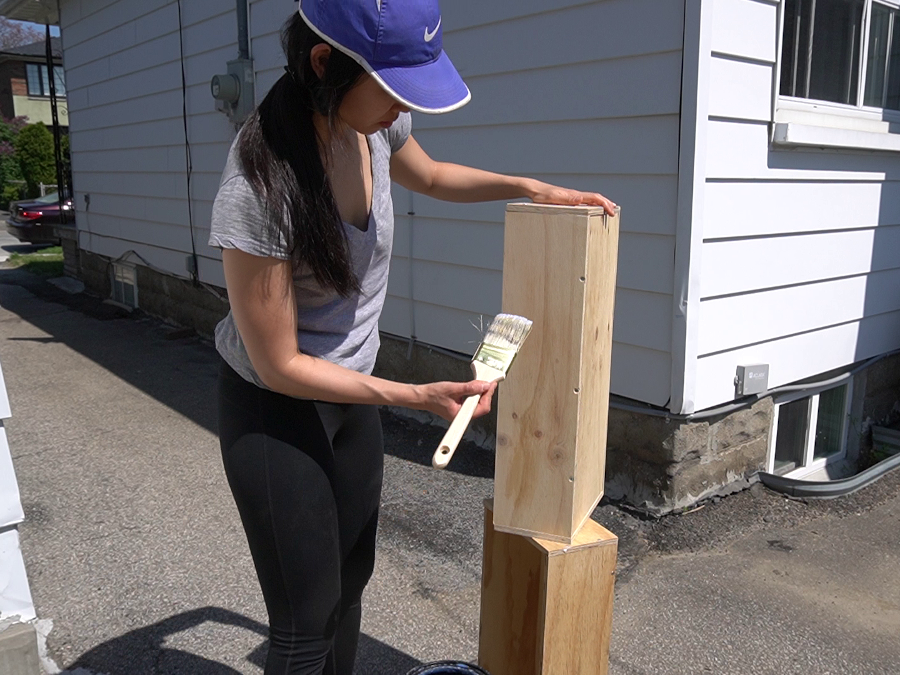
Our last step was to sand and apply a finishing coat to the drawers and then sand again. We generally use an acrylic for all our woodworking because it's inexpensive, fast-drying, non-toxic, easy to clean up (simply wash with water as it is water-based), and beginner-proof.
Installing the Drawers
This was the real headache.
There is a well-known term, DIYaccumulation (akin to bioaccumulation) where rookie errors gradually add up into relationship-wrecking, anger-inducing, tear-jerking project roadblocks.
Just kidding, I made that term up. But it definitely applied here.
First, our box on the truck is not square. Everything is off by an inch here or there but with the box being made primarily of aluminum brackets and sheets, it wasn't an issue.
Despite Moritz's effort to build the frame at right angles, nothing was perfectly at right angles.
Again, neither were the drawers, which measured in at 4 mm of misalignment at the worst, and 1 mm at the best.
Installing the Drawer Slides
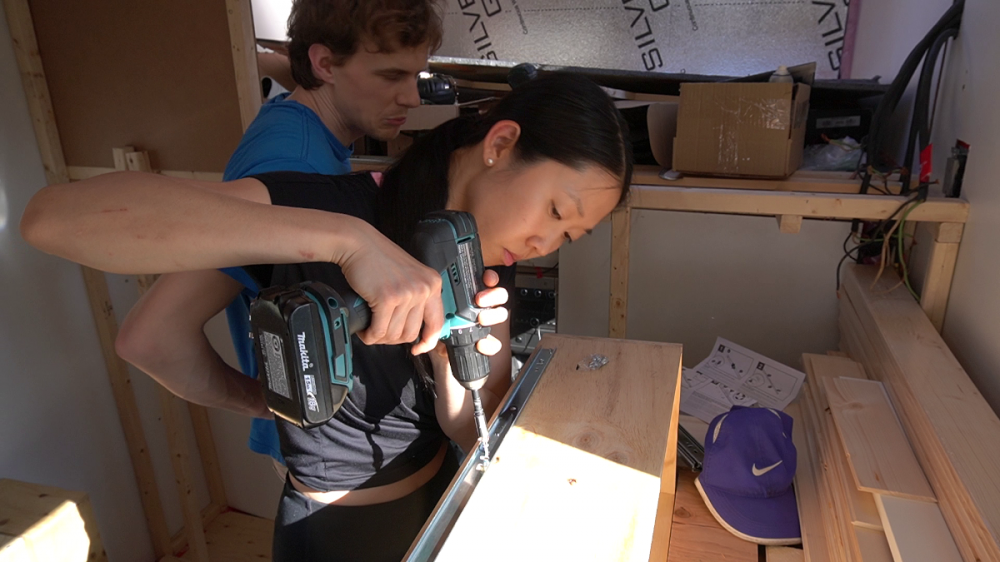
We followed the manufacturer's instructions to install the drawer slides. Make sure to measure five times and screw in once, lest you run out of space for mistakes.
You start by separating the drawer slides into each of their two pieces: one which attaches to the drawer and the other which attaches to the frame.
Attach the correct piece to the drawer and then slide the frame piece back on.
Installing the Drawers into the Frame
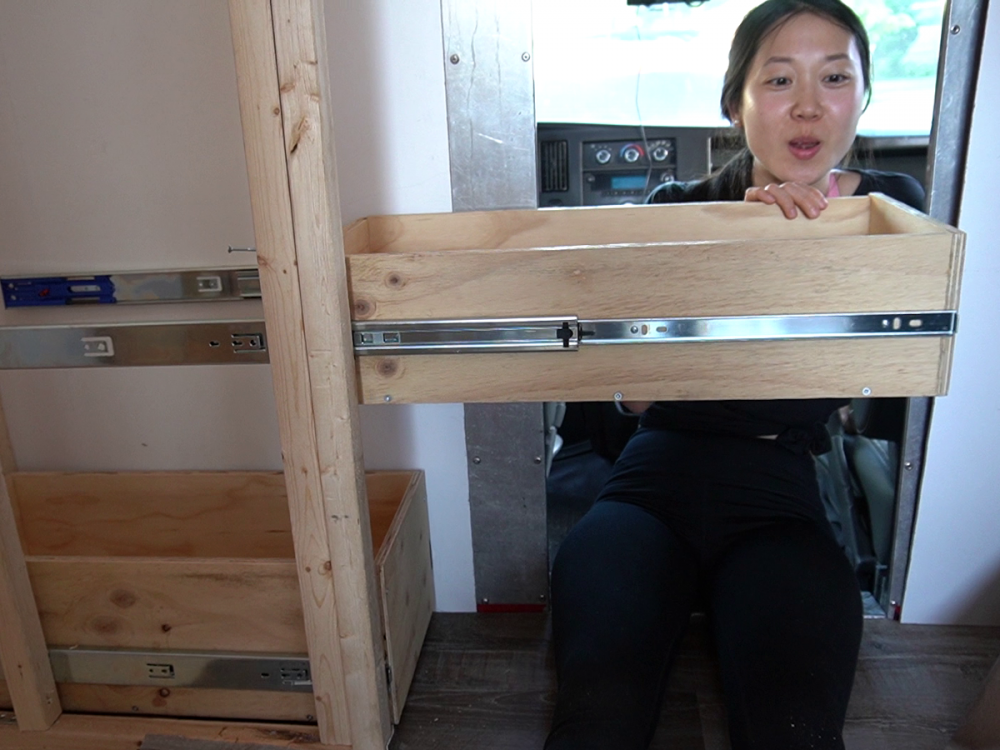
Again, following manufacturer's instructions, we held the drawers in place and measured where to attach them to the frame.
Most cabinets will have proper panels on either side for which to attach the drawer slides to. For us, we only had our frames, so we had to be strategic with where we installed them. We had to adjust the frame itself a few times to square them off, which was rather annoying, but it did the trick.
We were so happy when the drawers fit AND slid out properly. They are a little sticky due to our off-measurements, but we'll live with it.
Lessons Learned for Next Time
- Table saw. This would've been a game changer. Our circular saw went off course and were the only cuts that threw off the dimensions of our drawers. We should've sucked up our ego and asked our friends across the street or rented one from Home Depot ($45 for the day—we didn't know it was this inexpensive).
- Power sander. That is, not Sachiko, but a proper, electrically-powered sander. Sanding all those darn drawers by hand was tedious and time-consuming. I would've rather saved my energy for the installation.
- Build the cabinet for the drawers, not the drawers for the frame. Usually, this is what happens. You'd build the entire cabinet and then install it into the van. Though, the silver-lining is, if you have odd spaces like this in your camper, it IS possible to build drawers for the space.
- Full picture. Unfortunately, the way the drawers are currently built doesn't give us enough space to build a door jamb on the inside of the box. Instead, it will have to go into the cab. We're not sure how this will work out, so you'll have to stay tuned.
What's Next?
At the moment, we are debating how to install the appearance boards because we didn't consider how we'd auto-lock (e.g. latches, magenets) the drawers in place while on the road. Since our frame doesn't have horizontal panels, there is no place for us to attach these auto-locks except for onto the frames.
We hope you enjoyed reading this mini-tutorial and seeing our progress. If you have any ideas about what we should do for locking the drawers in place aesthetically, let us know in the comments!
See you on the road to pitches,
Sachiko + Moritz
perry Nelson