It's All About the Right Framing
First, a quick HAPPY announcement. We sold the arrow! These things go for a fortune and we banked $900 on our 2016 model. /fistpump.
April and early May were all about framing:
- alcove was extended
- kitchen counters
- shower stall
- dinette
And of course, we'll give you an update on our finances as at the end of April.
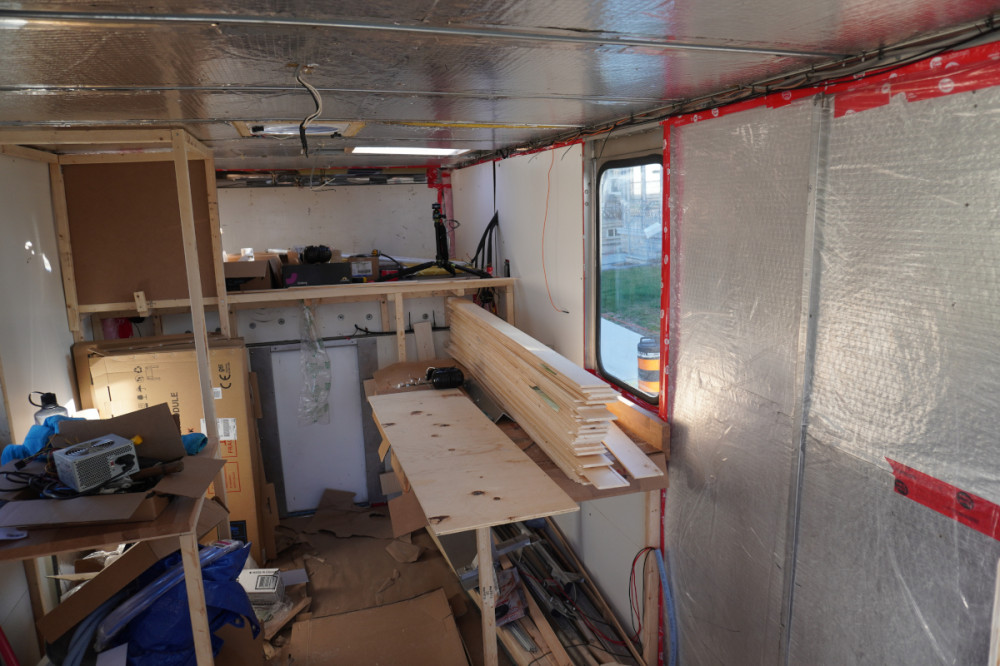
This was the state of the box before we finished the pine paneling and dinette frame. You'll see the stack of pine panels cut to length sitting on our makeshift workbench/kitchen counter.
Final Layout and Drawing
Before we jump into each area of the truck, let us share our layout and design. This is our 3D model built in TinkerCAD, which we'll cover below. Use your mouse to zoom, rotate, and interact with the model!
Why We Love This Design!
We mulled over the design for SO LONG. In total, we probably spent over 20 hours together reworking over 5 iterations. We settled on this final one for the following reasons:
- Kitchen space - We have a full kitchen counter measuring 160 cm long and 60 cm deep. We are going with a portable cooking unit to have the option of cooking outside!
- Permanent bed - It was decided that we'd have a permanent bed after Moritz pointed out that he's the one who makes the bed every day. We're able to utilize the alcove more efficiently this way as well.
- Permanent dinette - We love how cozy the dinette looks and having this space be permanent will cater to our laziness (see above re: bed). The dinette will be on a raised platform which will double as storage for awkward items like yoga mats, tents, and camping chairs. We are working on a design that would make this area also function as a couch.
- Storage - We have SO MUCH storage in this box now. The storage unit next to the sink will be for clothing. The storage bench for the bikes will fit climbing gear. There will be a floor to ceiling shoe cubby next to the entrance for shoes and knickknacks. The alcove extension will also have a tonne of space for stuff. Our battery and heater will sit under the tall storage unit.
How We Designed Our Layout
The most common recommendation you'll find is SketchUp, but I (Sachiko), could NOT for the life of me figure out how to use it efficiently. I even had a friend give me a quick tutorial. For the level of granularity we needed—which was not much—SketchUp was not user-friendly enough. The word also sounded like "ketchup," which made me crave fries every time.
This was when I found TinkerCAD by searching for "simple CAD online." I spent some time going through their tutorials, which took 15-30 minutes and that was it! The features were all extremely intuitive and I was designing our first layout in no time.
Design Obstacles We Overcame
I'll be going over our design challenges in our upcoming YouTube video, but here are the slides where we listed our limitations with each design.
Here are key considerations that would impact every build:
- Weight loading - Our first drawing had all the heavy pieces on the left side with most of them behind the rear axle. Your heaviest items will always be your water, batteries, and fridge (when loaded). We finally decided to move our bed to the alcove when our friend Katy mentioned that they had to be careful about weight restrictions when they rented a similar moving truck. We didn't want to chance this, which prompted the redesign.
- Plumbing logistics - A few drawings had the shower on the opposite side of the sink, which we could've worked around with some creative plumbing. But since we are trying to be as low-cost and as low-waste as possible, we decided it was best to have the shower and sink in close quarters.
- Storage - I admire vanbuilders who are able to pre-assign a section to store each and every item they will take on the road. Unfortunately, we aren't those people. Instead, to make sure we'll cover most of our bases, we decided to go with storage of a variety of sizes and to look for creative ways to maximize our space. We have the advantage of ceiling height, so went with full-sized cabinets and raised platforms in our design.
- Cost (dollas AND time) - We haven't yet built out the actual storage drawers and doors, but what we did do was assess the costs. Turns out, IKEA is actually comparable in price to what we're looking for and it is already pre-cut! We're trying to be cheap, but we also don't want to skimp on appearance (living in this for a year+ will be a long time!). Balance this with saving time and enjoyment as well—both of us decided we weren't keen on building cabinets due to our lack of space. We'd have to spend so much time planning, preparing, and makingshifting in our tiny apartment and truck that it would be more annoying than fun.
Bedroom
Travelling with our tiny rooftop tent gave us a good gauge of how much mattress space we'd need. The mattress in the tent only measures 90 cm in width. It's just enough to fit two people who are snuggled up very closely. While there's an additional 10 cm on each side of the mattress in the tent, the alcove in the truck is really only 90 cm deep. To give us a little bit more space, we decided to extend the alcove by another 30 cm so it would fit a regular-sized twin mattress.
We tested the space with our rooftop tent bed. Look at all that height! Not as coffin-y as we expected, but we'll be losing a few inches to the bed slats and the ceiling.
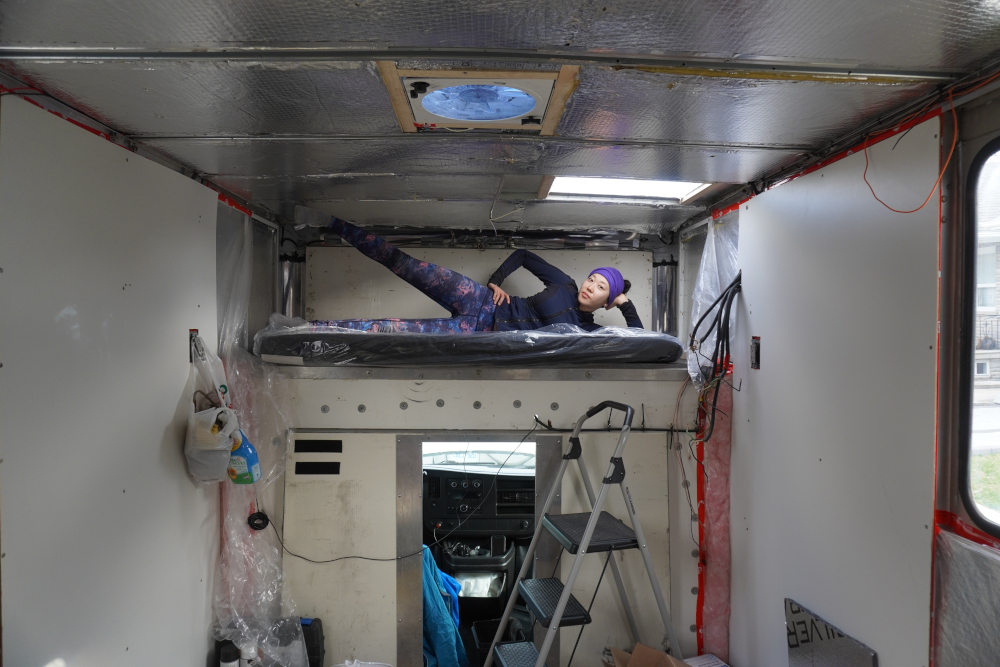
We took a nap for good measure. No complaints here, so then we started to work on the frame.
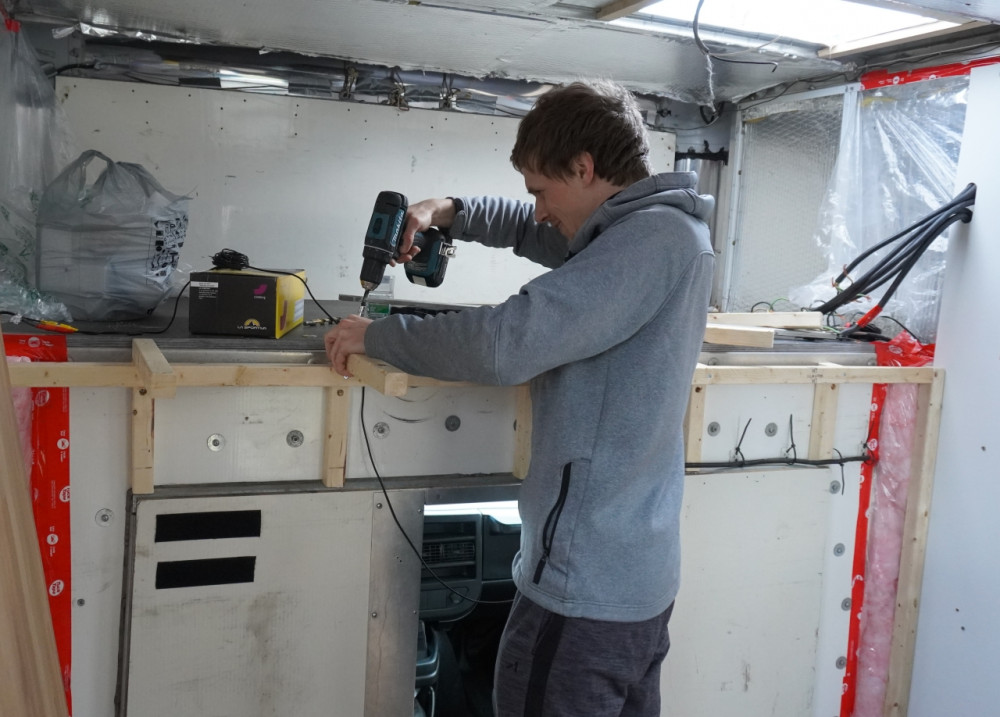
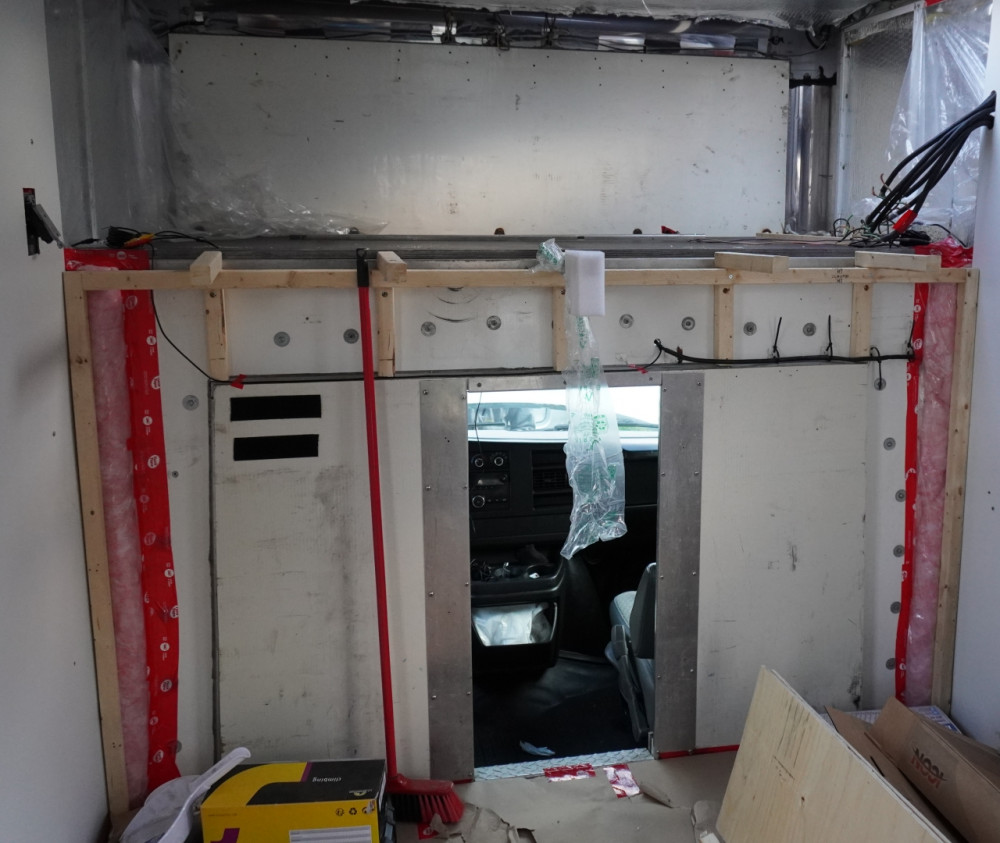
The extension will double as storage space underneath and the supporting beams coming up from the floor also double as frames for the adjacent shower stall on the driver's side and our kitchen counter on the passenger's side. Moritz didn't have too much of a plan for building the frames and just WENT FOR IT. Most of the layout was directed by where the windows are located in the truck and how long our counters were.
Shower Stall and Sink
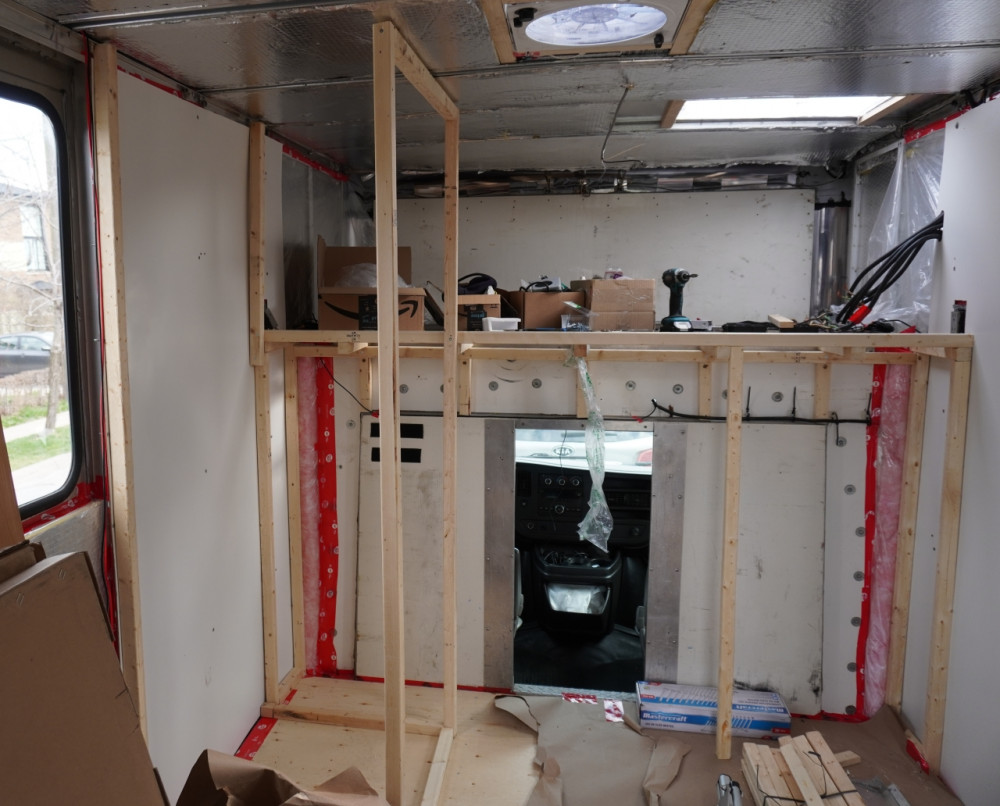
On the driver's side will be a tiny shower stall and composting toilet. Next step will be installing the plumbing, waterproof walls, and a shower pan. We're currently thinking of building our own pan made of wood with a fibreglass/epoxy coating to make it waterproof. It will be a very similar process to when we built the rooftop tent. We'll cover this in another blog post.
Next to the shower stall will be another small counter to fit the sink. This way we can keep all the pumbing on one side of the truck and won't need to route it through the entire box.
Kitchen Counter
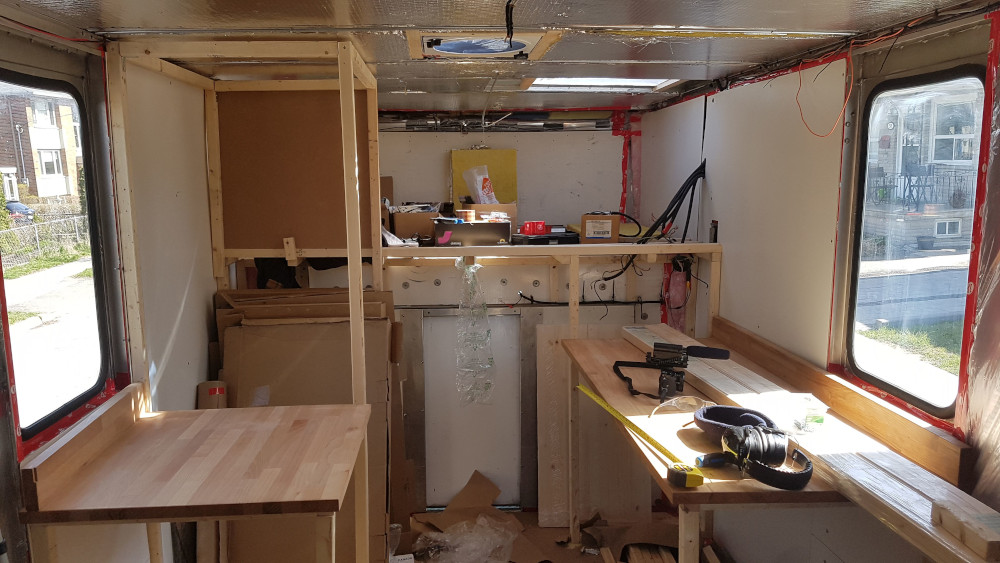
We lucked out and found two butcher blocks on Kijiji for $250 total. We cut them down to the standard 60 cm counter depth and the trimming was just tall enough for an upper ledge at the rear. Our plan is to install IKEA cabinets to minimize the work on building furniture. As mentioned above, without a workshop or storage area, building cabinets from scratch would be no fun. It will take just as much time to put together the IKEA stuff and mount it in a way that it doesn't rattle apart while on the road.
Dinette and Walls
Our dinette is rather simple, but features a 25 cm raised platform for additional storage. We thought we'd include elements of our current basement apartment in case we missed it (but really, we didn't need all the headroom).
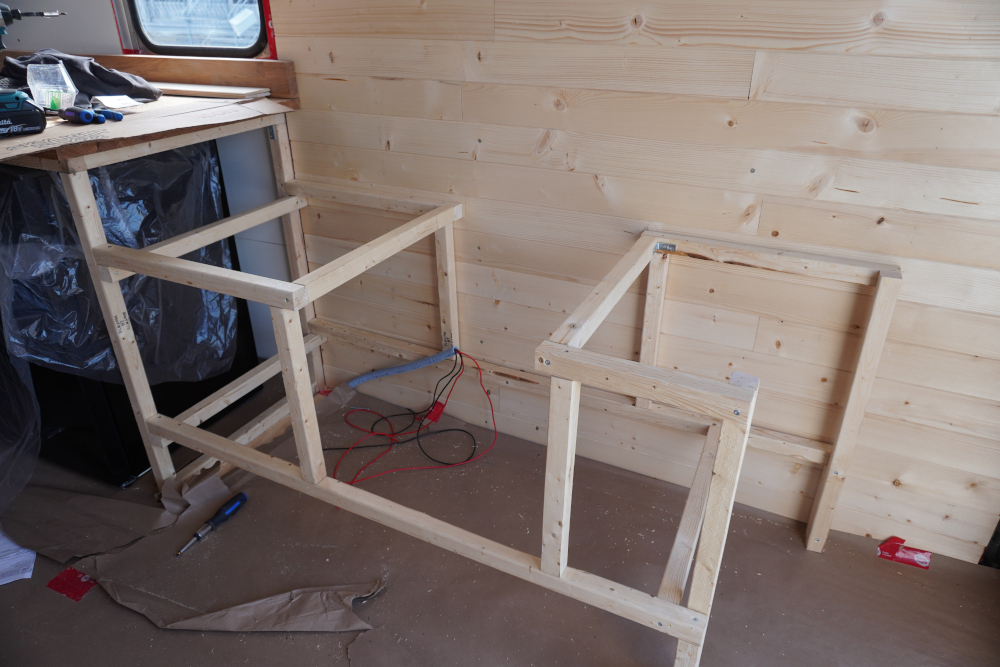
You'll notice we've also installed our new pine panel walls. It was an easy 2-day job with the both of us working on them. Nothing too fancy here. Our process was a little different from other vans though:
- Measure and cut pine panels to length, ensuring a staggered pattern for rigidity and aesthetics. This took forever as we had to do it with a circular handsaw inside the truck to avoid the rain.
- Cut two vertical beams to nail the panels to. Make sure you tap the sharp end of your nails with the hammer a few times to blunt them first, otherwise, the nail tip will only wedge between the wood fibers as opposed to splitting through them. Over time, this can cause the wood to split. Two nails per board, each 3 cm in from the edge. The vertical beams would situate between the metal frames of our box. This allowed us to pre-build the entire wall.
- Mount the entire pre-built wall to the frame of the box, ensuring to drill countersinks for the screwheads to sit in. You can do this by using a drill tip that's about the same size of the head. Just don't screw all the way through. Pine is a soft wood and we didn't want a weird bulge around the screws. For harder woods, the panels might splinter if you don't do this.
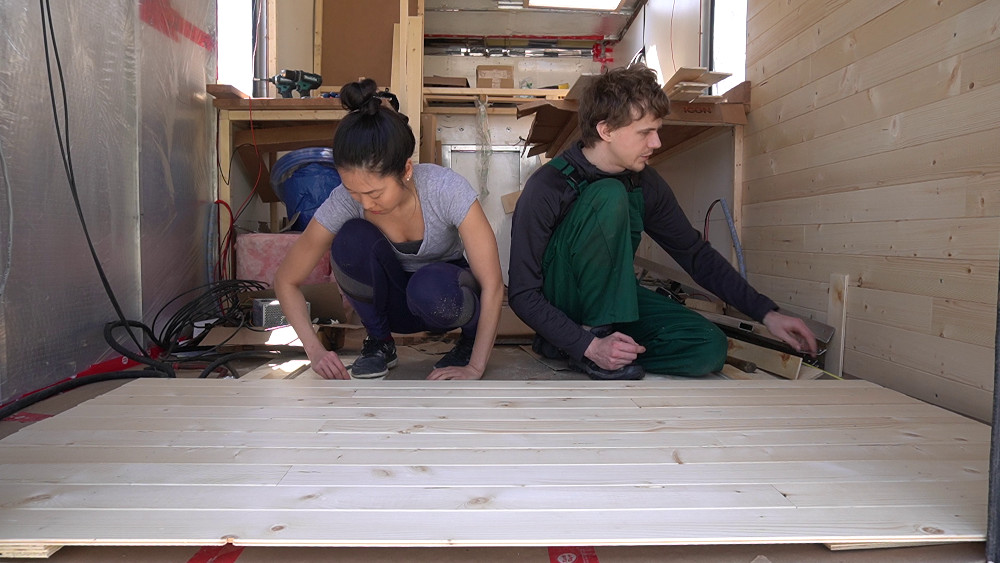
Otherwise, I can see why so many vanbuilders choose pine panels. They're light, cost-effective, and easy to install. Plus, they look great!
Monthly Financial Review
We Spent $894 in April
Our top three expenses:
- $385 - Pine panels and white particleboards
- $226 - Fridge and peripherals
- $118 - Lumber for framing
Let me just start with this:
We severely underestimated our costs.
Not because we didn't do appropriate price checks and estimates, but mostly because we're deciding to use higher quality materials. We're also splurging more on appliances to improve our standard of living. For example, we budgeted $60 for a used fridge (which we found a few of), but decided to go with a larger 4.4 cubic feet fridge at triple our budget.
Same goes for the pine panels. We originally thought we'd slap the walls together using crappy particle board, but the pine panels look SO MUCH better. Obviously, we're over budget for both of these categories.
At the moment, we are expecting to be over budget by $3,860 out of $22,020, which is 18%. Bad? Not bad? This excludes the media category which has cost us $1,450 so far, mostly for camera gear.
I Saved $4,441 in April
Which makes up for me, Sachiko, botching some of the earlier numbers and the low savings during March. Don't fret, most of the reduction in March was due to me reallocating some funds to illiquid, long-term savings. April was also an anomaly month because I got an (expected) tax refund.
And that's it folks! Catch you next time.
On the road to pitches,
Moritz + Chiko