Building a Shower Stall
We left you in the breeze on our shower, but rest asured, work has continued. We took a break from building as it was scorching hot. Despite our insulation, the box heats up beyond 36°C and we weren't keen on sweating in this hotbox.
With the days cooling down as of late, we finally tackled the shower stall.
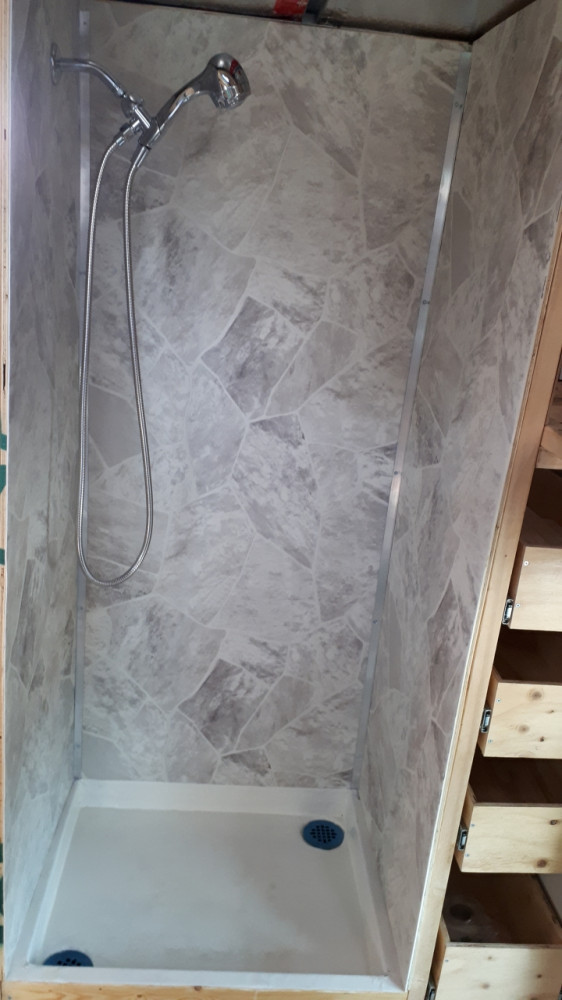
This post, we'll show you how we:
- waterproofed the shower stall walls,
- installed them to the frame,
- installed the shower head, and
- how we setup the ceiling and lights.
Building considerations
Ensuring the walls were waterproof was our top priority. We brainstormed the list below with materials appearing in no specific order.
Each material has its own pros and cons, which I will cover before announcing our choice. We are curious to hear your opinions, so comment below.
| Materials | Pros | Cons |
|---|---|---|
|
Plywood + |
|
|
| Plywood + regular tiles and grout |
|
|
| Plywood + vinyl sheets |
|
|
| Plywood + FRP boards |
|
|
| PVC Foam Boards |
|
|
| ACM panels |
|
|
We decided to go with plywood panels and glue sheets of vinyl flooring on top. With this option, we could save some money, achieve a decent appearance, and have durable, waterproof and easy-to-clean walls.
For the ceiling, we chose plywood, which we'd paint to make it moisture-resistant. For lighting, I designed a floating panel with an LED strip to cast soft light onto the walls.
Installing the walls
We selected a vinyl sheet with a light marble pattern. After fitting the plywood panels and minimizing the gaps (to accommodate our slightly crooked frame), we laid them on top of the vinyl sheet to act as a template. The vinyl sheet was cut roughly to shape. Although we attempted to line up the patterns, one or more of the sheets got rotated or flipped along the way. We marked each board on the backside to know where each piece was to be attached to the frame (i.e. front vs. back; left vs. right).
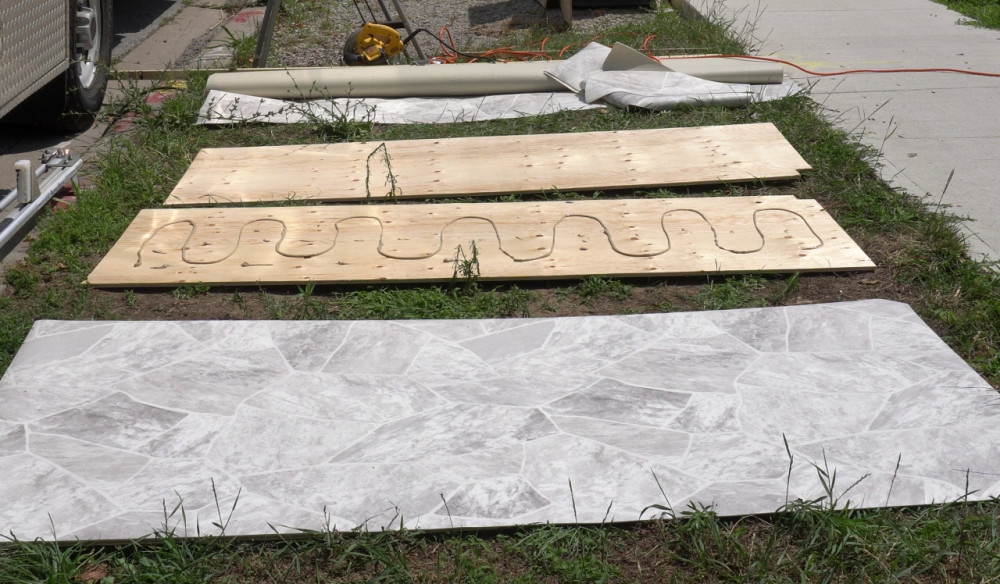
With the vinyl sheets ready, it was time to apply the glue. We laid a zigzag of glue from top to bottom, keeping a 10 cm margin on all sides. This let us peel back the vinyl sheet to affix the panel to the frame and then glue the vinyl overtop of the screws. 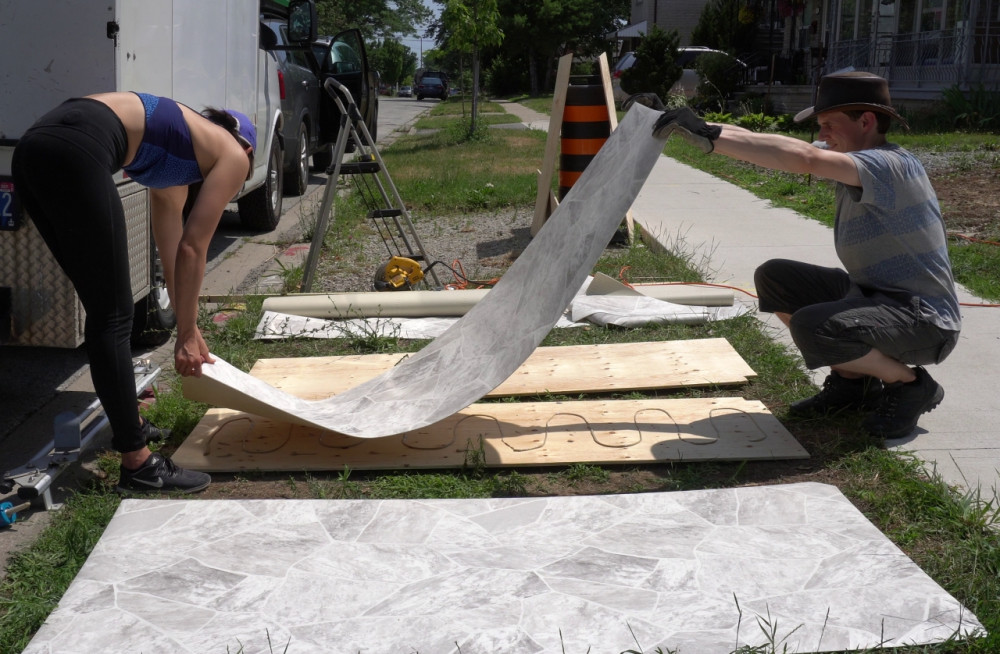
If you are not in possession of a trowel, then we suggest purchasing sturdy cake scrapers from Amazon. For a fraction of the price, you get the same product in a different form.
We let the panels cure for an hour so that the vinyl sheets won't slip down the plywood when we stood them up. When attaching the plywood panels to the frame, we added scrap lumber where needed to securely attach the panels to the frame. Pay attention to the order in which you attach your panels! For us, it made sense to attach the back panel first, followed by the side panels as these were accessible. For your build, it may be different.
One of the side walls features a hole for the shower head. I used a 1/2 inch drop ear elbow, which was mounted to a piece of 2x4 with a hole.
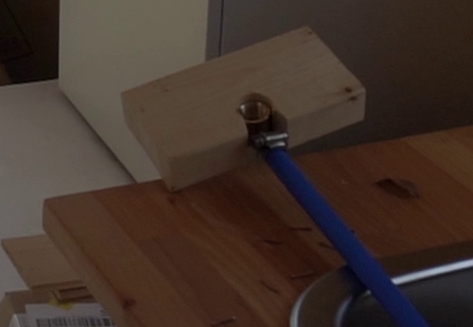
We have yet to install our water mixer and the shower valve, but this task was not critical for setting up the walls.
The last step for the walls was to seal the seams. We layed out a big bead of clear silicone and attached an aluminium angle piece over top. It helps to divert the water but also connects the walls structually with each other. The corners on the bottom are sealed against the showerpan with more silicone.
Installing the ceiling
The ceiling took longer than I had liked because, as we mentioned, nothing is straight in the truck. It took me two attempts to cut it to the right shape, but now it fits very snugly. We've left the rough plywood pattern to give it a rustic look, but painted it white. On top sits a frame of 1x2s with an LED strip attached at the outer sides. That frame was then covered with pine panels to achieve the floating look.
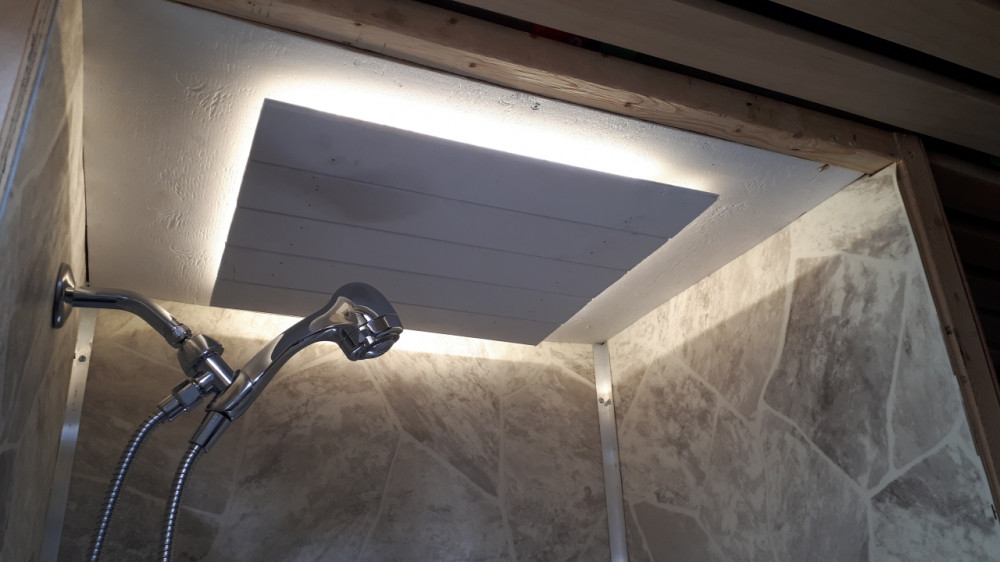
We'll have to test if the light is bright enough or if we maybe need another potlight in the middle.
Total cost
The total cost of this project was approximately $290. We had hoped for less (as per usual), but we're happy to be sub-$300 for this mini-project.
- $20 - shower head
- $25 - aluminum brackets
- $180 - vinyl sheets (have some waste)
- $40 - plywood
- $5 - LED lights
- $5 - silicone
- $12 - glue
- $35 - water mixer
- $8 - box of screws
Final thoughts
We have momentary shock when comparing the current state of the camper to its original form. Since beginning demolition in February, we've come so far! Being within the action, it's easy to forget how much we've done, so we thought we'd take a moment here to highlight our milestones:
- Jan 2020 - Purchased the box truck.
- Feb 2020 - Began demolition.
- Mar 2020 - First YouTube video released! Floors.
- Apr 2020 - Wall insulation, first wall, vent, skylight, framing, pine walls.
- May 2020 - Design finalized, dinette framing, leaks, water heater, drawers.
- Jun 2020 - Shower pan, butcher blocks, ceiling. (Where we are currently with our videos.)
- Jul 2020 - Shower stall, plumbing, vacation.
- Aug 2020 - Tiles and more plumbing!
We're approaching finishing touches here and our fingers are crossed that we can take ol' Cubert out for a spin within the next month or so! Thanks for sticking around.
See you on the road to pitches,
Moritz + Sachiko