Quickstart Guide to Creating YouTube Videos
I’m going to take a van build detour to show you our entire YouTube process, from filming to video processing and post-publication social media alignment. This post is applicable to new videographers or those interested in the behind-the-scenes of YouTube videos. For veteran YouTubers, perhaps what we do might inspire you to try something different!
When we first had the idea of filming our camper build to document and share our process, we didn't realize there were so many things to consider. But it turns out that Moritz and I each enjoy different parts of the process and we've had a lot of fun learning together. Being able to share our story in multiple formats has also been extremely rewarding.
If you are new to all of this, don't let these tasks dissuade you! The best part is they can be broken down into bite-sized pieces. You'll begin to get the hang of making videos after editing around 45 minutes of footage.
This post is MASSIVE, so I'm going to start with a Table of Contents, which doubles as a checklist for every video.
Table of Contents
Combining Clips, Voiceovers, and Music
Preparing to Publish on YouTube
Social Media Alignment
Monitoring Feedback, Engagement, & Analytics
Starting with the Stats
First, some benchmarks and stats to set the stage.
Amount of Time to Produce a YouTube Video
A quick Google search reveals that a YouTube video takes anywhere from 2 to 300 hours to produce. The average is 7 hours per 1-5 minutes of video. On the light end, 2 hours is equivalent to watching a movie, whereas on the heavy end, 300 hours is equivalent to the number of vacation days Germans get! We'll see where we stack up by the end of this.
Amount of Footage per YouTube Video
I couldn't find a stat on this, but I can tell you ours. Since most of our footage is filmed simply by setting the camera on a tripod and speeding the footage up 2-100x (cutting wood is a slow process), it's not like we're actively filming all of it. I also couldn't figure out a way to easily grab the duration of each clip, so I extrapolated using a sample of files:
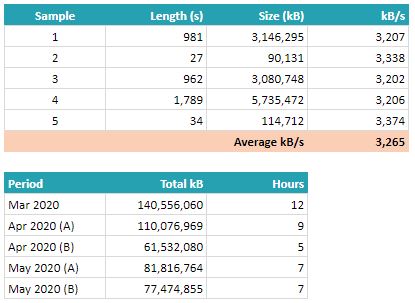
On average, one second of video we film is approximately 3,265 kB.
Each period represents a collection of footage used in one video. On average then, we film 8 hours of footage per video release on YouTube.
Unfortunately, I do not have stats on the efficiency of our filming (e.g. length used vs. length filmed), but it's probably quite crap at like 20%.
Total Footage Filmed as at June 27, 2020
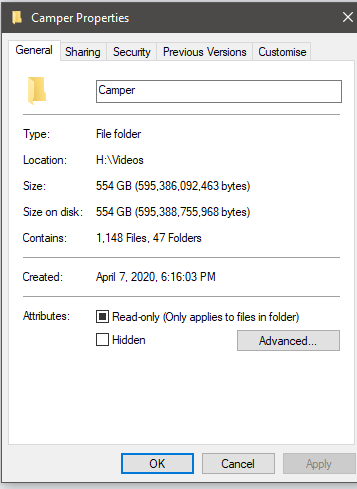
Currently, 6 months into filming and we are sitting at 554 GB of data for our videos alone. We bought an additional 4 TB drive for this endeavour and we are glad we did.
Creating YouTube Videos
This is not meant as a definitive guide, but these are the steps which have worked for us.
Step 1: Planning
Ideation
Fortunately, the theme of our videos naturally come with a plot—the timeline of how we convert our box truck. The order in which we complete our build provides a chronological sequence to the footage and each project we finish provides the theme of the video.
What we struggle with is how to incorporate our story.
Telling a Story
Some viewers want videos to cut to the chase, "Just tell me how to do it already!" Others want a dramatic, almost romanticized storyline. Most want something in between.
Moritz loves long DIY videos. He's happy with full 15-45 minute-long videos of sped up footage overlaid with text, minimal talking, of someone building an amphibious vehicle from scratch, for example. Plus, a light sprinkling of humour and personality in the opening/closing scenes to see who the person is and what they're all about.
I, on the other hand, like a healthy blend of information and storyline. I want to either learn something or be entertained by every video I watch. I'm okay with some rambling as long as it adds to the "why" of the plot, or if it shows me the creator's personality. I'm a stickler for editing and decent music.
As you can see, these differences in video styles cause friction when we are planning our videos. We are constantly weighing whether we are talking too much and whether we've included enough "how-to's" in the footage.
- Have we told the audience enough about us? Do they even care?
- Will this topic be engaging, entertaining, educational?
- Can we sufficiently portray this in video format? Do we need supplementary articles or images?
We consider all of these things when planning for our video, but admittedly, our planning process is not that concrete since our videos err more on the side of vlogging. For our videos, it goes something like this:
- Starting point - Where do we want to start? We often pick up where we left off in our last video.
- End point - Where's a good place to stop? We've been using a monthly cadence, but have recently diverged from it to fit in an extra video in June. Usually, a good endpoint is after a milestone, e.g. solar panels have been mounted!
- Adding a story - What tidbits about us do we want to weave into our content? We try to add 1-2 non-DIY info about us or things we did to showcase our story or to relate to the audience.
These three steps help us set up a cut-off point in our footage and gives us an idea of additional footage we'll need. Most of the work comes together in the next phases.
Step 2: Preparing the Footage
Filming
When filming, there are a few key items to consider.
Audio
Having good audio quality is mandatory. Viewers will often disregard lower video quality if you have good audio. Having good audio quality means:
- Viewers can hear speakers clearly (or where muffled, subtitles are provided);
- Music, speech, and sounds are balanced;
- Audio is generally clear, free of static, odd tones, and background noise; and
- Audio sounds "real," as if the viewer was right there with you, that is, it doesn't sound tinny or hollow.
The cleaner your audio is to start with, the easier your editing process later.
Lighting
Just because Game of Thrones did it (finale episode), doesn't mean it's acceptable. Make sure you've got the right lighting for your shoot, and at minimal, make sure it's at least bright enough that the audience can see what's going on. Natural light is preferred.
Camera Position
Guidelines used in photography apply here. You'll want to apply the rule of thirds and consider whether the composition of your frame is visually balanced. With DIY footage, we try to give our users as many viewpoints as necessary to show them what we did:
- The whole picture—including the both of us working on pine panels, for example—to show the space we needed and the work effort;
- A different angle of the whole picture, so the viewer can see the action from multiple spots; and,
- Close-up macro shots of finer detail work, such as using a drill bit to manually cut screw countersinks.
Something we are working on is making b-rolls to illustrate the scene, but that's a completely different topic of its own.
We only have one camera, so unless it's Moritz or I filming each other, the camera usually resides on a tripod so that we can move it around quickly and instantly record what we are doing.
What to Film
In our fourth episode, I had to do numerous voiceovers because we weren't thoughtful with how we filmed our footage during those projects. Our lessons learned and advice on what to film are:
- Film an introduction. Every. Single. Time. At the beginning of day of filming, record an introduction. Even if it's done selfie-style, you'll thank yourself later when you don't have to come up with a script to explain what you've done.
- Explain along the way! Talk to your audience as the day goes on. Even if you're not filming the whole time, take moments to "check in" so that you can dish out any learning points, ideas, or stories that have popped up. You can then spin this into your video as opposed to my FAVOURITE, voiceovers.
- Turn the camera on anyway. You never know when you'll catch some golden moments. We've missed so many because we didn't think to bring the camera along or to turn it on. It's candid moments like these that help you tell your story.
- End the day with filming an outtro. Conclude what you've done, what you've learned. You wouldn't leave your friend's house without saying goodbye, why would you do the same on YouTube? Show some manners.
If we feel we are missing any footage, we prepare a script and go back to film it. These are the footages that take the most amount of time to produce as we have to go get the truck, maybe drive to a nice location, and do several takes to live up to my envisioned piece of perfection.
Organizing your Media
I organize my media by type, photos vs. videos. Then, within the media type, the topic, e.g. Camper, Yoga, Archer (our friends' doggo).
For the camper, my file directory tree is mostly flat with the folder structure like this:
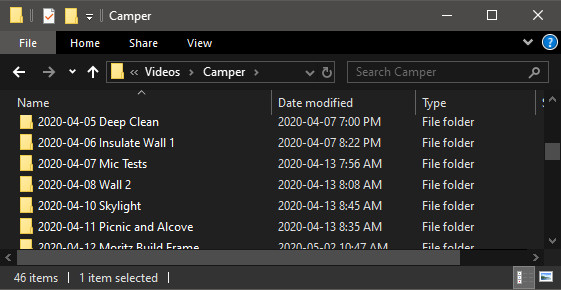
I start with a typical YYYY-MM-DD format for sorting purposes. I started adding the subject recently and it's helped me immensely when looking for old footage or to find out what we did during a specific date.
We use a Sony A6100 to film. In raw format, the videos show up like this:
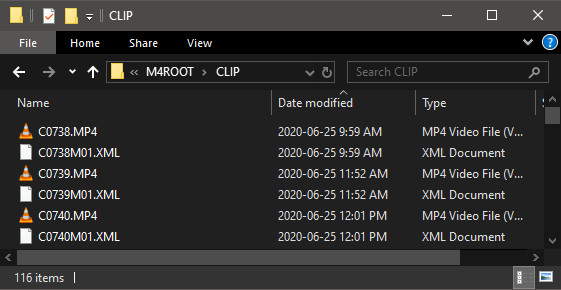
At the end of each weekend, Moritz and I will go through the footage together, deleting everything that is boring or a potato shot. (What's the camera equivalent to a butt dial?) We watch the footage in super speed, tabbing through each video to see what it was about to label each file.
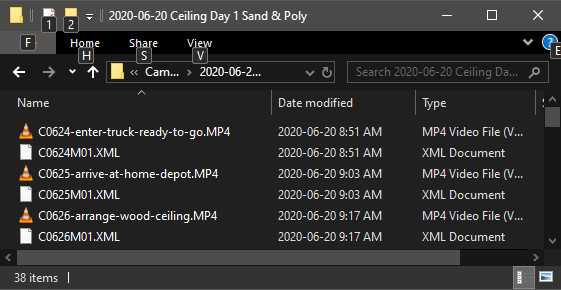
We keep the original naming convention provided by our camera because it helps us sort the videos when we put them together. We also retain each clip's XML file (a file that carries metadata about the clip) which has the same file name. That way, we don't have to rename both.
We organize our files in these steps:
- Copy footage, including XML files, from the camera onto my external hard drive. This takes anywhere from 10 seconds to 30 minutes depending on the total size of files. The most common limitation of transfer speed is your SD card reader. We are using the camera's USB 2 cable for transferring files; with a USB 3 SD card reader, the process would be much faster. See the Equipment section below.
- Watch footage, rename, and delete boring ones. Each file labeled so we know the content of the video. We also include special call-outs in the file title, e.g. "use-this," to remind us to use it.
- Rename the folder with a short description of that day's work. This makes searching for videos so much easier.
- Copy that folder over to our backup drive, aka. Moritz's external hard drive. See, redundancy is a common topic in file management AND rock climbing.
- After spot checking a few files to make sure they've copied over, I delete the originals on the camera. I have yet to configure WiFi transfer on the camera because I know it'll eat up battery quicker, but for photography, this would be a great option to set up.
This process takes about an hour, so for a month's worth of footage, that's about 4 hours.
Step 3: Making the Video
Now that we've accumulated some footage, built up some motivation to sit through hours of editing, and microwaved some popcorn, we're ready to start making the video.
Software - Kdenlive
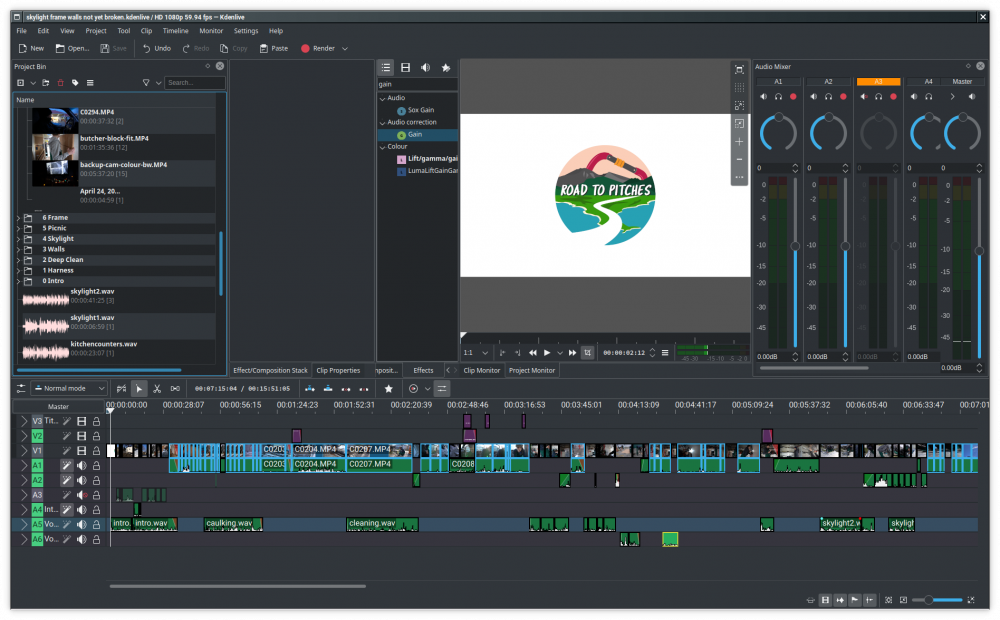
We use Kdenlive to put together our videos. Moritz is a cheapskate—THERE, I SAID IT! He refuses to pay for software when there are free, open source versions such as Kdenlive. I was skeptical at first, but I didn't have any video editing software to benchmark off of. Turns out, it's actually really good despite it being free! The documentation and UX needs work, but you can easily find how-to videos on YouTube. The only catch is that Kdenlive crashes at least once per edit session as one edit session spans multiple days. Make sure you save often.
Starting a New Video Project
We start each video by making a copy of our most recent video. By doing this, we are constantly working with a running version of our template. This way, we start with:
- the most-up-to-date title slides;
- the previous episode's clips for our intro; and
- audio tracks and their volume control settings pre-configured.
Organizing Footage and Other Files within Kdenlive
We organize the footage in the order that they show up and separate out music, audio, and title slides. Footage is sorted by scene and in the order they appear in. A completed video's project folders look like this.
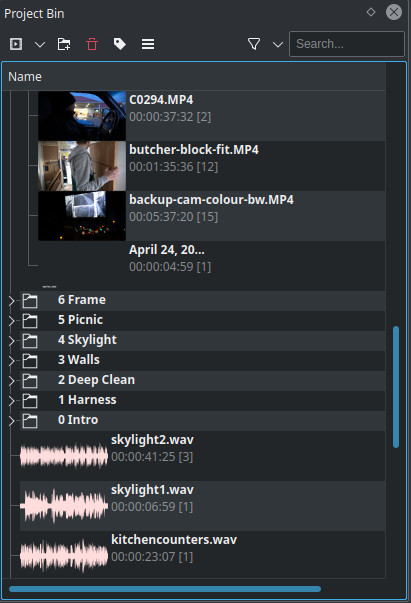
I can't stress enough how crucial it is to stay organized. When you're scrolling through dozens of clips to see which one to use, it's a huge pain if they're not sorted in some manner.
Let's start adding the content to your video project.
Combining Clips, Voiceovers, and Music
Selecting Clips
I start by dumping in all the clips from the particular day we filmed in a folder in the project bin. Usually, they end up matching the folder structure of our raw media directory.
Now, we go through each clip in detail, trimming and cutting the scenes we want directly in the main track. The most tedious part is cutting out all the vocal pauses, uhm's, and slip-ups that don't add to the video. I will also speed up timelapse clips at this point to get a real sense of how long the video will be.
To maximize your efficiency, I recommend learning keyboard shortcuts as soon as possible. For our first video, this part took us 8 hours to complete for a 10-minute production. Currently, this part takes me 4 hours to complete for a 15-minute video.
At this point, we decide if we have all the footage we want for the video. In 3 of the 5 videos thus far, we've gone back to take more footage or retake some scenes to make them clearer and/or less boring.
Splitting Apart and Editing Audio
My pet peeve is watching a video that goes from quiet vocals to loud drilling noises. While putting together the scenes above, I make a point of sorting the audio into various tracks based on the volume normalization they need. Naturally, they also arrange themselves by type:
- Direct vocal - The subject is speaking directly towards the microphone.
- Indirect vocal - The camera person is speaking behind the microphone or the subject is turned away as they are talking.
- Loud noises - Background noises, drills, saws, clangs from dropping stuff, Sachiko falling out of the truck.
This helps us mass filter audio rather than having to do each clip manually (but we usually end up editing each clip anyway).
In our first video, we noticed a hollow humming sound produced by our microphone, the Takstar SGC-598. I hated it; Moritz was happy to live with it. When I threatened to blow $300 on a Rode microphone, Moritz took matters into his own hands and did a teardown of our microphone to see if he can identify the issue.
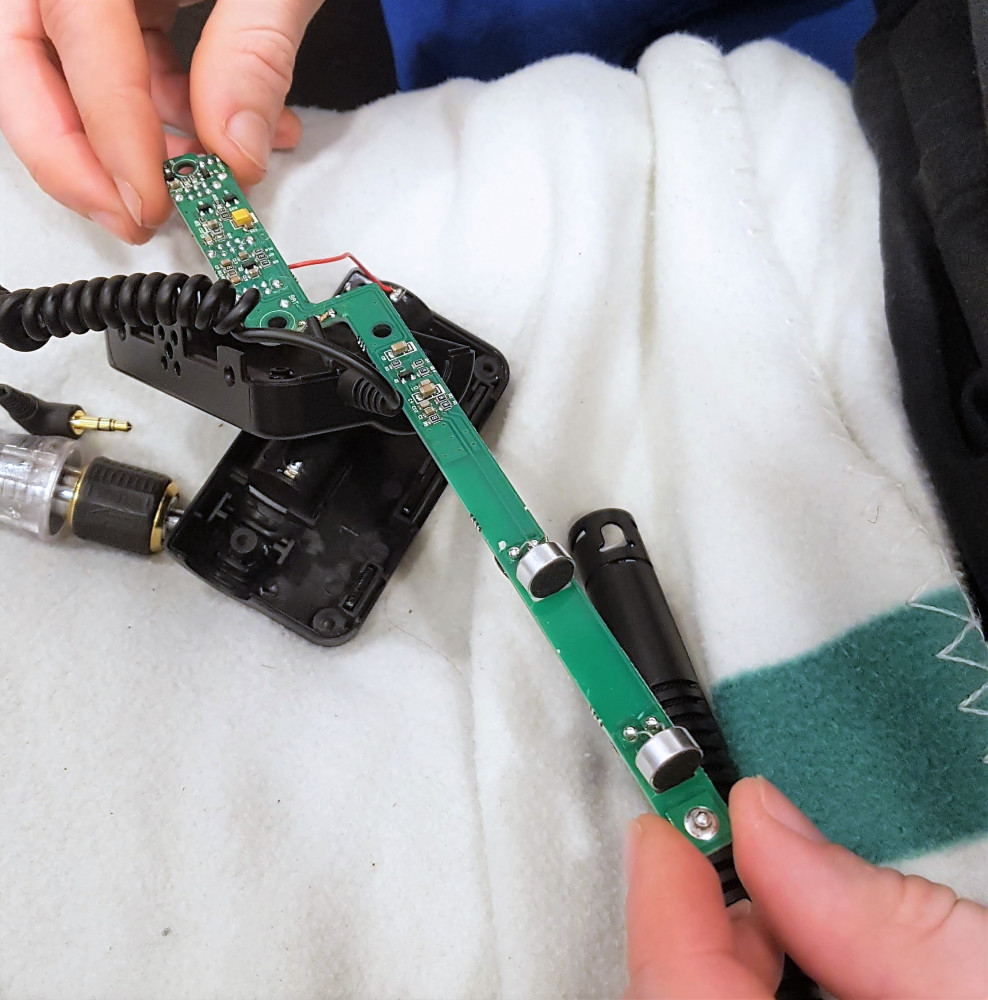
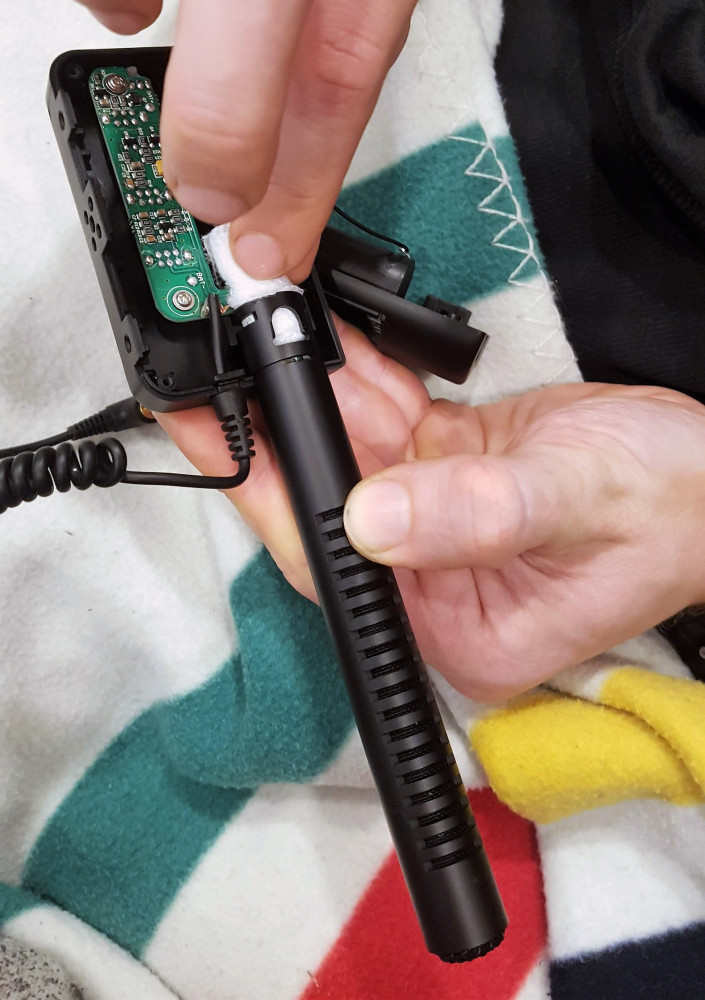
Upon closer inspection, it looks like where most microphones have a foam "blocker" at the back of the circuit board, it is missing in ours! This piece of foam absorbs sound waves as they pass by the microphone. Without it, the sound waves would bouce back. Moritz suspected that this was the cause of the hollow audio and background humming.
So, we plugged it. An OB branded tampon was the perfect fit.
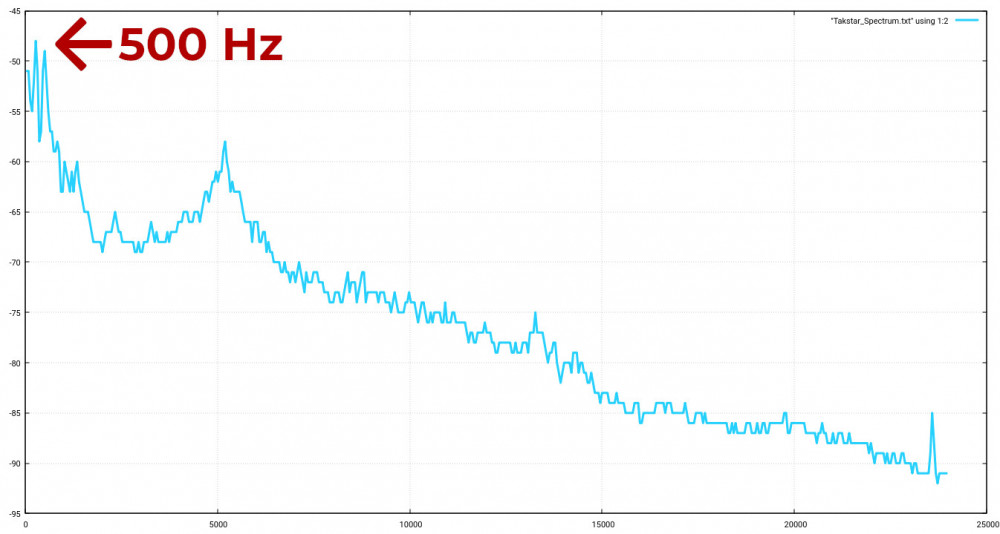
But this didn't solve the issue entirely. Another detailed post will cover this, but in short, a silent sample from our microphone showed that it was producing a tone at 500 Hz. Moritz configured a filter that offset this tone so that we no longer had the awful humming in our audio. Now, we just make sure we apply this filter to all tracks where audio was recorded with this microphone.
For all other audio, we normalize our volumes so that both voices and drill/saw/wind noises are equalized.
Recording Voiceovers
While cutting together the footage in the previous phase, I'll also keep a running Google doc of clips that require further explanations via a voiceover or title slide.
Voiceovers are no fun because we don't have the right equipment. Previously, we used Moritz's computer mic, which only recorded in mono and points upwards. In the most recent video, we decided to use the microphone on the camera to keep all audio the same. This turned out much better.
The room we record in is, well, your average messy bedroom nook. Thus, the walls reverberate sound and make the voice recording sound hollow. This was our makeshift solution:
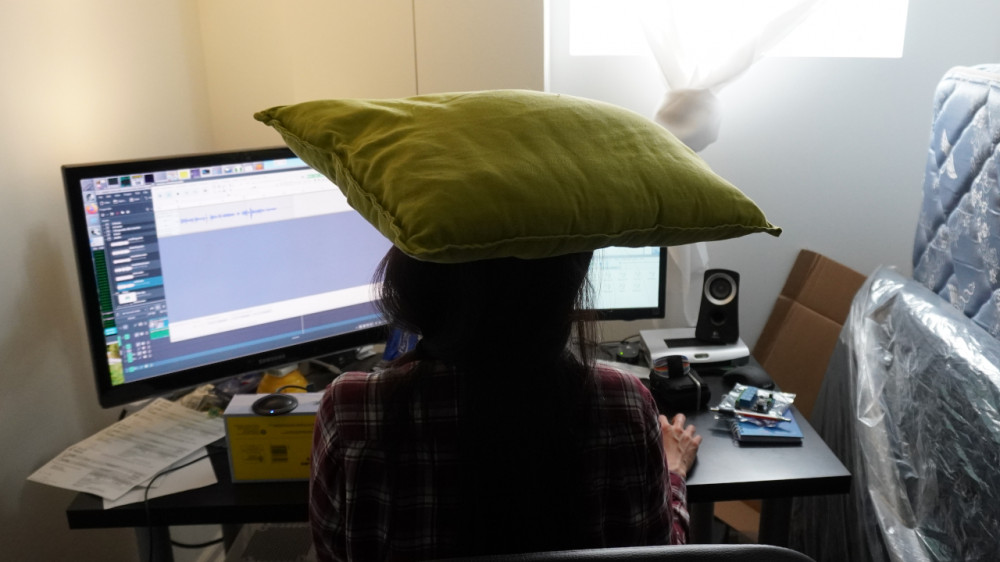
Generally, we've learned that doing voiceovers is a pain in the ass. You end up re-re-re-recording everything. Into Audacity it goes for some quick edits, then into Kdenlive for final cuts. They also give the video a documentary feel as opposed to a "take-you-along-for-the-ride" feel. We definitely prefer the latter.
Voiceovers, on average, have taken us 2 hours per video (with most effort spent on episode 4).
Adding Music
Music is a love/hate relationship in video editing. From looking for decent copyright free music, to normalizing the audio for the tracks, to adjusting their volumes when we are speaking in the videos, this last piece of the puzzle takes us 2 hours or more to complete.
For our first video, we listened to over a hundred music tracks on YouTube's audio library to select our favourites. ONE HUNDRED CHEESY YouTube TRACKS! This took 8 hours. Now that we've got our collection, it's a lot more efficient. Neither of us are musically inclined, so there's a lot of trial and error when selecting the right music. But, we have a lot of fun goofing around and playing with silly music that do not match our footage at all.
Adding Text or Images
This part is fairly straight forward. We add text or images where we feel that it helps clarify something we've said or done, or if it adds some humour to the clip. Text clips are called "title slides" in Kdenlive and the editor is very basic and unfortunately, not the most user-friendly.
Full Pass Editing
Now that we have all the substance in place, we do full pass edits. This means, we watch the video from start to finish without skipping. While we do this, we look out for the following:
- Vocal volume - Can we hear the person clearly in the clip? Are there any plosives or words that are extra loud that require a volume reduction?
- Vocal trimming - Are the vocals cut at the right part? Can we hear the full word, e.g. "hell-oh" as opposed to "ell-oh"?
- Music volume - Is the music an acceptable volume? Can we still hear the speaker and/or the sounds in the clip?
- Music transition - Is the cut-off abrupt? Is it possible to cut the song at the end of a bar or on a beat drop?
- Transitions between clips - Do the clips transition smoothly? Clips of the same scene can cut directly into each other, but sometimes, it is better to fade if the next clip is of a different scene altogether. What about the audio? Audio should start ~1 second prior to the visual starting on screen.
We do this at least twice. Yes, we get tired of seeing our faces and hearing our voices by the end. Full pass edits take us another hour.
Rendering
The next step is to render. Rendering on Moritz's desktop (CPU: AMD Ryzen 7 2700 / GPU: GeForce GTX1050 / RAM: 32 GB) takes about as long as the duration of the video.
Full Pass Editing: Round 2
Similar to how you'd check your PDF after publishing, you do the same with videos. We apply the same thoughts as the above, and perform a live edit as we watch, then re-render the file. At this point, it's probably yet another day already and I'm annoyed at the process, so I let Moritz do the final QA. Once that's complete, he takes over publishing.
Step 4: Publishing
I wish we could tell you that it's simply upload and done at this point, but it's not.
Preparing to Publish on YouTube
Thumbnail Image
How many times have you overlooked a YouTube video because its thumbnail didn't catch your eye?
A YouTube thunbnail is like a book's cover. We have to make sure it's catchy, sometimes click-baity, but genuinely representative of what we are trying to show.
We usually end up using a capture of our footage unless it made more sense for us to take a photo. In our fourth episode, we had an idea for a thumbnail that showcased our video content (caulking in our climbing gear), so we took some time to do a mini photoshoot.
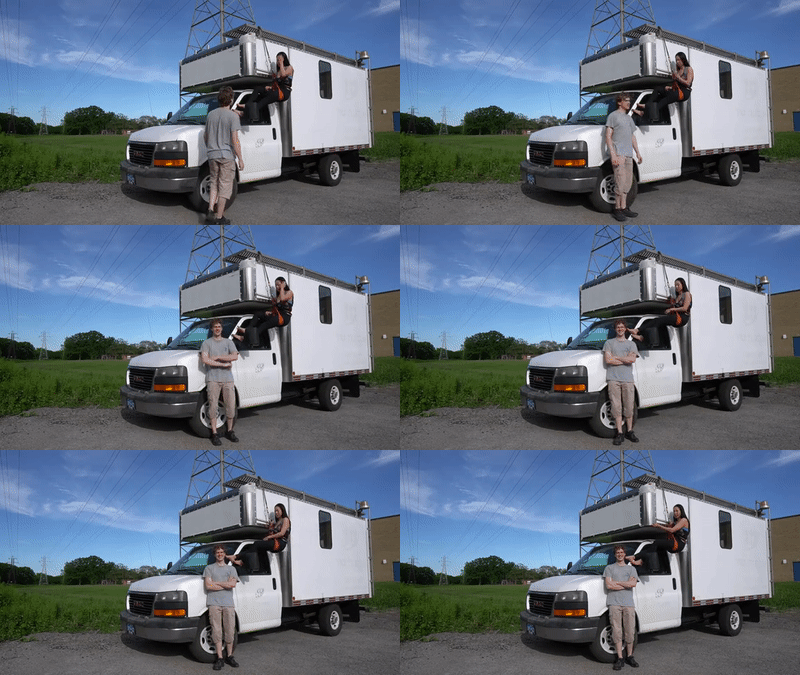
All of our photoshop work is done in GIMP, which is another free, open source software. Not as good as photoshop, but hella good for it being free!
The most time-consuming part of the thumbnail process is drawing the path to create the white borders around the subject. This takes me anywhere between 15-40 minutes depending on how detailed I want to be. On average, a thumbnail takes us around 1 hour to process, from filtering to final deliberations, but we are getting faster at it.
Video Title and Description
Personally, I hate ambiguous, uncatchy titles and vague, unhelpful descriptions. Titles should be exciting! Make me want to watch the video. Once I click into a video, I expect a proper description of what is being shown and where I can find more info.
By the time we publish our video, we'll have already posted on Instagram or our blog about what's in the footage, so the description only takes me about 10-15 minutes to put together.
During this process, we also have to make sure we've followed all disclosure policies on media that we've used or links that we've shared.
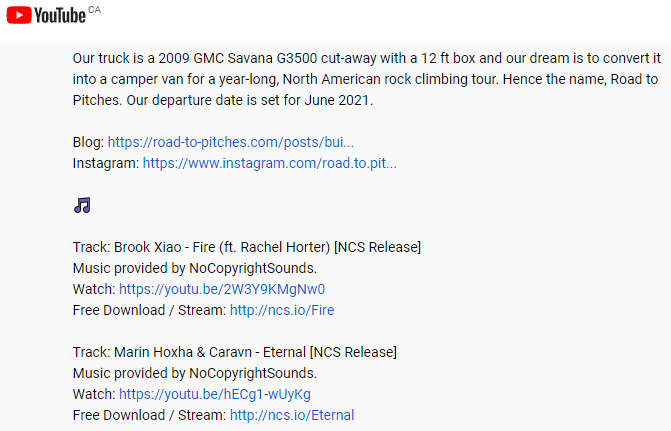
Here's an example of our description from our fifth video, "BOX TRUCK BUILD | Month #5. Installing Walls, Framing Dinette, and Why We Are Doing This!":
Social Media Alignment
We are social! We are on YouTube, Instagram, Twitter, Facebook, LBRY, and we have this website. When a video is released, I make sure to broadcast it on Road to Pitches's Instagram network in our Feed and in Stories. I share these over to my personal handle. Moritz handles uploading to YouTube and sharing over to LBRY, another video platform, and posting on our blog.
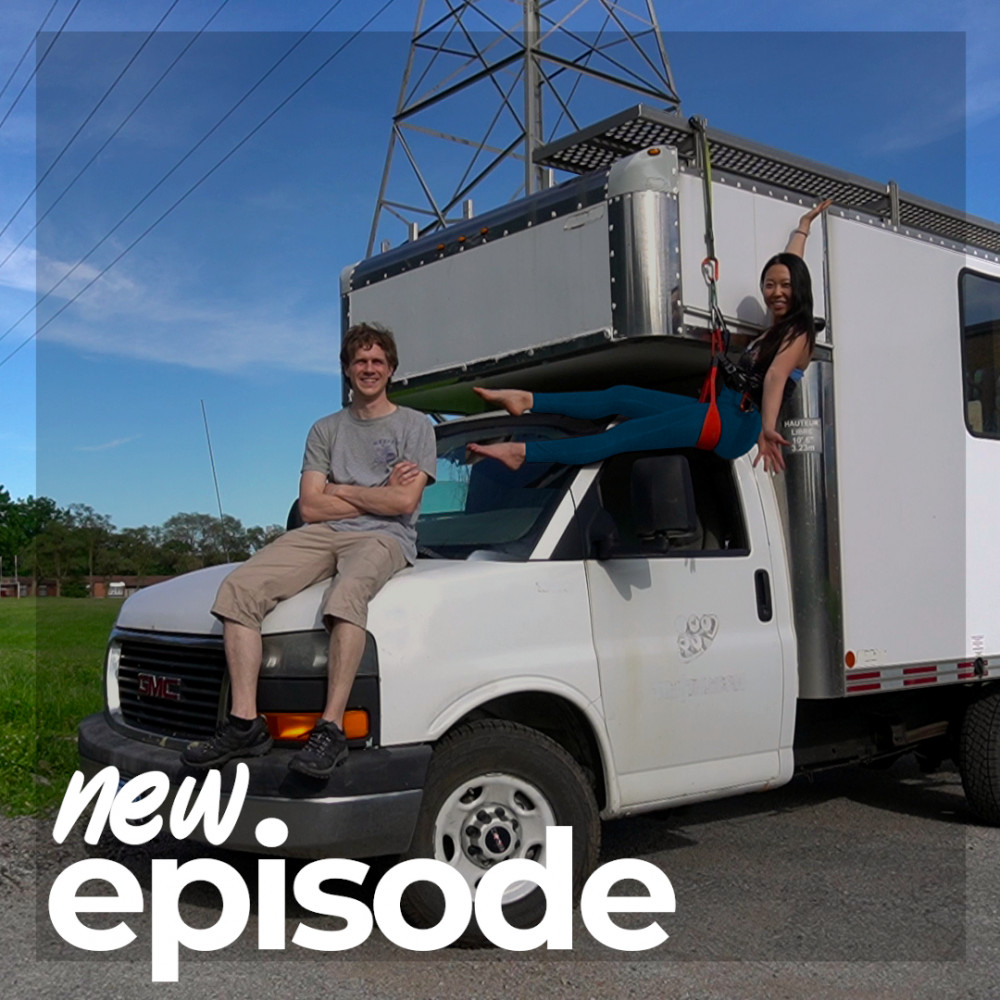
Preparing IG posts take me anywhere from 15 minutes to an hour, depending on the amount of ramble I have in me. Sharing to LBRY and our blog takes Moritz about 30 minutes as he has to re-render the video for LBRY.
Honestly, social media is a another love/hate relationship for me. We're not attention-seekers, but we know we need to put ourselves out there if we want to be able to inspire, motivate, or help others. However, with putting yourself out there, you also can't ignore the reception of your content. I try not to place too much weight on our likes and views.
Total Effort from Start to Finish
Let's tally it up!
| Planning | 1.0 hour |
| Filming (average per video) | 8.0 hours |
| Organizing media | 4.0 hours |
| Combining clips | 4.0 hours |
| Adding audio | 2.0 hours |
| Adding music | 2.0 hours |
| Full pass edits | 2.0 hours |
| Rendering | 0.5 hours |
| Social media | 1.5 hours |
| Total | 25.0 hours |
Google said it takes an average of 7 hours per 1-5 minutes of video. Our videos average 13.5 minutes, so that should be 18.9 to 94.5 hours per video. I'd say we're pretty average!
Monitoring Feedback, Engagement, & Analytics
We are still growing our platform and community, so monitoring comments and engaging with our audience takes minimal time. I'd reckon that as our media grows, we'd pay more attention to analytics to maximize our engagement and to understand what content our viewers are most interested in.
Equipment We Use
Camera
We aren't professionals of photography or videography by any means, so we needed a camera that was easy to use as our first foray into the YouTube space. After a whole month of research, we settled on the Sony A6100 (after first trying the Sony A6000 and deciding against it). We looked for a camera that met the following requirements.
- Budget-friendly - The camera was majorly discounted during Boxing Week in the winter and we paid CA$1,160 for the camera and lens. Our budget was $700, but we knew we'd be using it often so we bit the bullet and went for something we could see ourselves using for several years to come.
- Microphone jack - Internal camera mics are usually shoddy. The Sony A6000 does not have a microphone jack and the only external microphone that was compatible with the camera was an expensive Sony-branded one that would affix to the hotshoe. Despite the A6000 costing less, after adding on the expensive microphone, it was only about $150 less than buying the A6100, which would open up use of all mics on the market.
- Light-weight - We intend on traveling with this camera and decided that mirrorless was the way to go.
There were some other cool features that came with the A6100 such as animal eye focus and continuous auto focus, which we now know we cannot live without. We highly recommend this camera for both beginner videography and photography.
Microphone
As mentioned, our microphone is the Takstar SGC-598, which came in at a whopping CA$45 for us. Phew, really blew the bank there! It's been treating us well after Moritz setup the filter for the weird humming at 500 Hz.
Our next upgrade would be a RODE microphone, which will be our celebratory gift to ourselves when we hit 1,000 subscribers on YouTube.
SD Card
We use the SanDisk Extreme Pro 128 GB card rated at UHS Speed Class 3, which supports write speeds of up to 90 MB/s. Class 3 is required to record video in 4K. The majority of our footage is recorded in full HD.
Tripod
We use a Rangers compact tripod similar to the GEEKOTO Tripod 200cm sold on Amazon. What we love about our tripod is that it is easy to use, sturdy, and portable. Extending the legs take no time at all and allows us to switch angles and frames quickly. The ball head lets us tilt the camera in any direction we need to straighten the shot in seconds. It also folds down into a compact case and is only 2.88 lbs.
Why We Do This
We mentioned in our fourth video that there's nothing more heartwarming than hearing our loved ones say, "It's like we're right there with you," and "When's the next one coming out?" after they watch our videos. For Moritz, with his parents, family, and many of his friends overseas in Germany, this has been the best way for us to share our lives with them.
And for you! We've received feedback from strangers on the internet thanking us for our spreadsheet tools. They've been inspired by our build, or simply, enjoyed our video content. We love that we're able to make this connection and it's become even more valuable now that getting outside and meeting people is more restricted.
With that, I'll close off here. I hope you learned a thing or two about this process. Please drop us a comment below if you liked the material, if there's something else you'd rather see, or if you have any questions.
See you on the Road to Pitches,
Sachiko (+ Moritz)