Custom Shower Pan Using Epoxy & Fibreglass
Water is just as important as electricity in a van build. Not only will we need a source of water to cook with and drink from, but we'll also need water to clean (dishes and ourselves) as well as a proper catchment.
In this article, I'll introduce you to our water system and show you how we built our custom DIY shower pan with easily accessible materials. In an upcoming post, I'll show you how we modified an electrical water heater to run on our battery.
Planning Our Water System
Similar to our electrical system, we needed to align the water supply to our daily needs while considering how we could make its maintenance as easy as possible (e.g. how often we'll need to refill or dispose our dirty water). In a typical household, water usage is split into three areas of use, each making up a third of our daily consumption:
- Flushing the toilet
- Personal hygene (mainly showering)
- Everything else (cooking, laundry, dishes)
The average consumption has a wide range depending on the country you live in. In some countries, daily consumption is as low as 150 L (European nations) and up to 400 L (US).
Without being permanently connected to a source of water, water usage while living in a camper van changes significantly. In addition, there are some unique considerations, such as its weight and amount of space the storage tanks will take up.
Weight and Space
The more water you carry, the higher your fuel bill—it's no rocket science. Plus, if we are lugging around water unnecessarily, there will be added wear and tear on the vehicle, for example, when braking the truck. Luckily, our monster of a box truck is rated to carry a heavy load (this is one of the reasons we went with this vehicle instead of a Sprinter) and we've got a tonne of space beheath the box. In most camper builds, when you're limited in weight and space, you'll need to consider whether the trade-off is worth it.
Bathroom Water Usage
We've opted to build a composting toilet that will not use any water. I advocated for a shower in our build early on whereas Sachiko was dreaming of a stealth camper and was happy to forgo her showers. Even if we plan on using campground showers or lakes most of the time, I think it's nice to have the option to shower in our space. This will come in especially handy when we are out in the backcountry. Better yet, it doesn't even add extra footprint for our design seeing as we'll be using the shower room for our toilet as well.
A quick Google search shows us that an average American shower lasts 7.8 minutes and uses 60 L of water. Likely, we will use up to that for the both of us each time we shower.
Laundry Water Usage
The washing machine strapped on top of the box truck is rated for 200 L per use. This brings the height of our vehicle to a whopping 11.3 m. Look out, bridges!
Can we even do that?!
But in all seriousness, we'll likely rely on laundromats. If we're really in the bushes, then I'd like to try the good ol' barrel method. Fill 'er up with soap water and our dirty clothes, tie it down to the hitch, and drive for a few hours. The shakin' and quakin' will clean our clothes no problemo.
Kitchen Water Usage
What's left is cooking and cleaning dishes, plus drinking water. On camping trips, we can use as little as 2 L if there's a stream or lake nearby for cleaning.
With a little research on how much other campers carry, we think 100 L of water will be sufficient. For generating hot water, we first looked into an instant propane hot water heater. The obvious disadvantages are the open flame and what to do with the exhaust fumes. Plus, this would add quite a bit to our propane gas bill. More research brought me to a small 10 L electrical water heater which we could modify to run on our 24 V system and so, it will be fed by our solar system basically for free.
For potable water, we chose to add a water filter and install a faucet with a separate tap for the filtered water. The water will get prefiltered before we run it into our tanks, but this will only prevent larger dirt particles and sediment. I'm also thinking of adding a UV system, but will have to research further to see if UV-LEDs are strong enough to kill viruses or bacteria. It looks to be an easy modification to build and install. This addition would produce a very small energy footprint, but have a huge impact on the potability of our water.
With our planning explained, let's start with the first piece of custom-DIY part that make up our bathroom: the shower pan!
How to Build a Custom Shower Pan for Your Camper
As mentioned, we'll go over how we built a custom shower pan to fit into our space perfectly. Our next blog will show you how to modify an off-the-shelf electric water heater to run on your 12 V (or in our case 24 V) battery.
Materials and Cost
You may hear this a lot on this blog: building materials are expensive! But, off-the-shelf camper van parts are EVEN more expensive, at least double or triple the cost. If you have the time and are willing to put in some effort, you can manufacture your own parts instead. The shower pan is no exception to this statement. The cheapest shower pan on Home Depot (which doesn't fit our space) is CA$189. We figured, we're custom-building our truck, so why not build our shower pan as well.
Here's our bill of materials:
|
$10 |
|
$4 |
|
$20 |
|
$6 |
|
$0 $5 (leftover from ceiling fan and skylight) |
|
$0 $40 (leftover from last year's rooftop tent project) |
|
$0 $5 (leftover from rooftop tent project) |
|
$0 $6 (leftover from rooftop tent project) |
|
|
$0 $12 (leftover from rooftop tent project) |
|
|
$3 (guesstimate and wood glue is from cabinet build) |
| Total cost | $43 $111 |
Tools you'll need:
- a scraper
- pins to keep the fibreglass in place
- orbital sander
- 80 grit and 160 grit sandpaper
- rubber gloves
- eye protection
- respirator mask
- a paintbrush
- acetone (e.g. nail polish remover for cleaning)
- some plastic wrap/old newspaper to catch the epoxy or paint
The design is fairly simple: cut the plywood into two pieces with the dimensions of the shower stall (in our build, we had two sheets measuring 60 x 80 cm).
We got two drains from the local hardware store and placed them in opposite corners of the pan. This will ensure the water drains no matter which way the truck is tilted.
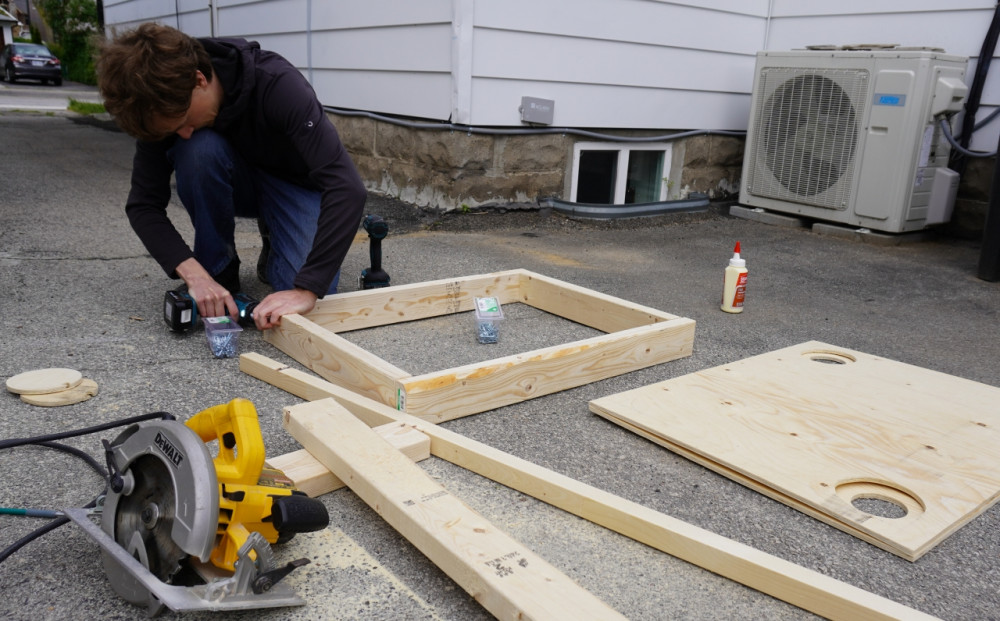
The first sheet of plywood gets two holes about 2 cm larger than the outer diamater of the drain in opposite corners. The second sheet of plywood gets smaller holes, that fit the outlet of the drain. Now glue both sheets of plywood together. The drain now sits in the recess made by combining the sheets to allow water to easily flow into the drains.
Cut the 2x4 lumber to build a frame on top of the plywood sheets. This will form the rim of the shower pan.
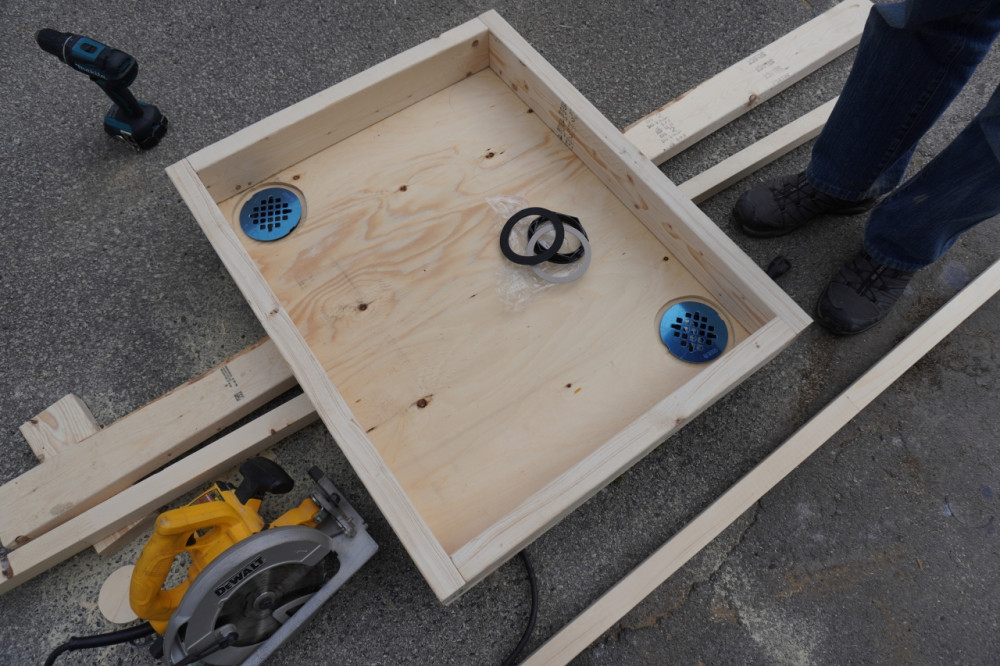
I had quite some fibreglass and epoxy left over from my rooftop tent build last year. Back then, I didn't have much experience with the material and thought I'd need 6 to 8 layers to get to the rigidity I wanted. In the end, I only needed three layers so making our shower pan was the perfect excuse to use up some more of that material. You can purchase fibreglass materials by the yard, so as you can see in our calculation above, it's still quite cheaper to build your own pan than to buy a pre-made one.
Starting with the stranded fibreglass mats, lay them over the pan and cut to the width of the inner rim. In our example, you have a piece with the width of 60 cm and another piece with the width of 80 cm. One layer will sit on top of the other on the bottom. The mats should touch at the corners, but don't worry about it not being super snug. You'll need to make a few pizza-like cuts for the drain holes, allowing the fibreglass to form into the drain-molds.
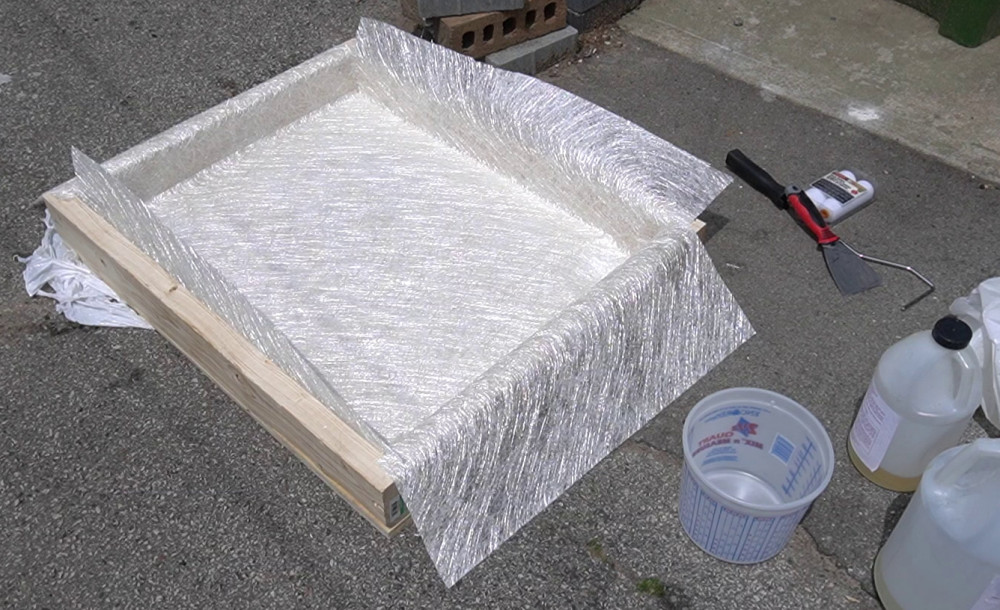
The process of mixing and applying the epoxy resin is fairly easy. Make sure to follow the exact instructions for your resin. You need to get the exact amount of hardener. This is where the measurement cups with ratio markings come in handy. If you screw up the mixture, your epoxy may never harden. It is also important that you do the job outside or in a well ventilated space. The process creates fumes that must be able to escape. For most resins, you'd want to have it nice and warm, 20°C to 25°C is ideal. The colder it is, the longer it takes to cure. Finally, make sure you are wearing gloves and eye protection! This stuff is super sticky, so wear something that can get dirty. If you need to wipe it off your skin or somewhere else, the only way is with acetone.
When you buy your resin, ask that you get a slow curing hardener. Mine takes about 40 to 45 minutes until it gets so sticky that you can't spread it anymore. Mix two or three smaller batches so you can take your time spreading your mixture within those 45 minutes. I did about 500 mL max at a time (which was about as much as I needed for the first layer of the pan). Always start with adding the epoxy into your measurement cup, then add the hardener. That's when the clock starts ticking. Mix it thorougly for a minute, then you can start pouring.
Add a generous drop in the middle and start spreading it out with the spatula. The first time I did this, I struggled for 15 minutes with a brush until Sachiko showed up and asked why I didn't use a spatula. The chopped strands are loose, so a brush picks up the strands as you go, whereas a spatula easily slides over them. When you get to the side walls, carefully scrape the resin upwards, but be careful not to move the fibreglass stuck to the bottom. There should be no air bubbles between the wood and the mat. Tight corners can be a bit tricky, use pins as needed. I can't stress pinning down the mat enough. Even something as small as a gust of wind could pick up and lift the mat out of place!
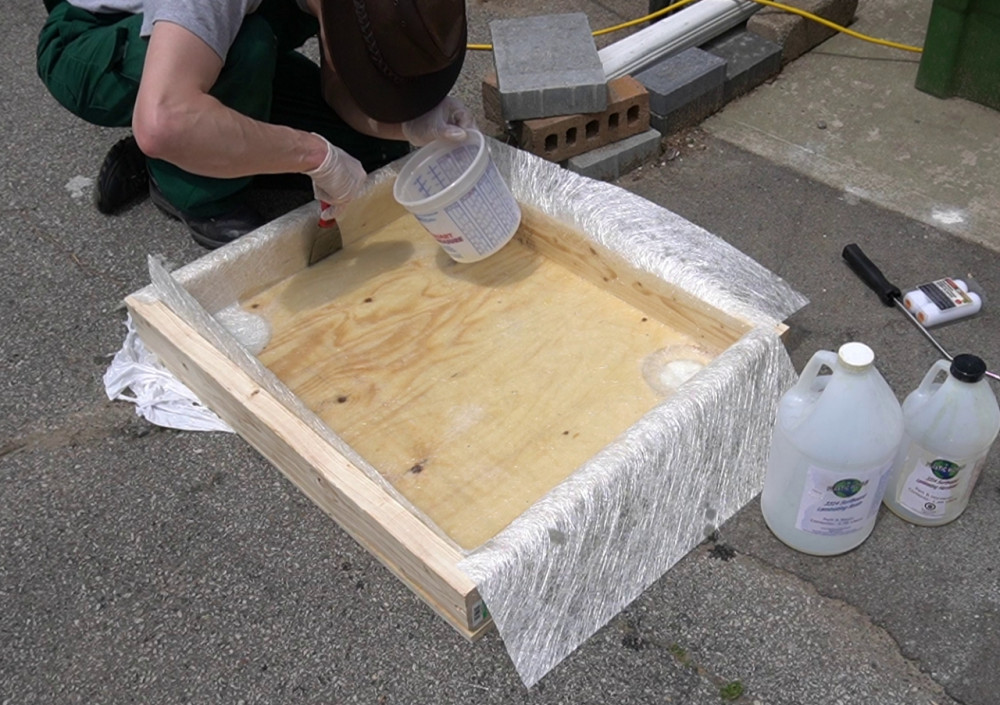
Once you get to this stage where the epoxy has soaked into the glass mat, causing it to become clear, then let it sit for about 12 hours (depending on your resin of course). When the epoxy is cured, you can cut off the overlapping pieces with scissors (use protective gloves, the material is rather sharp) and start sanding everything with 80 grit sandpaper.
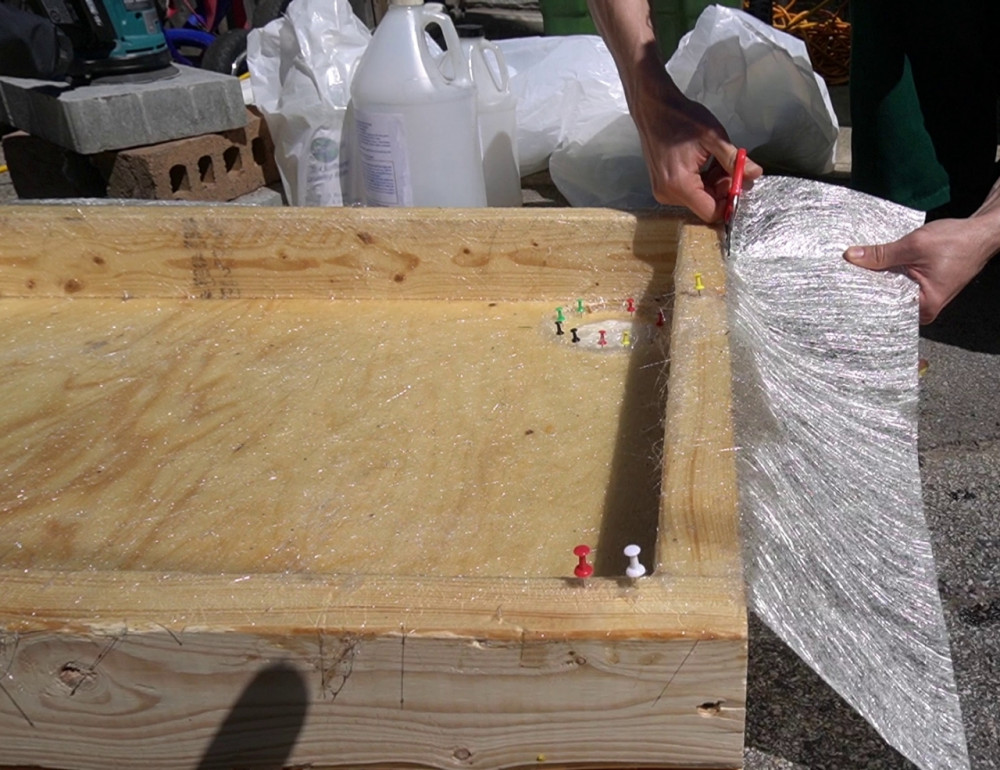
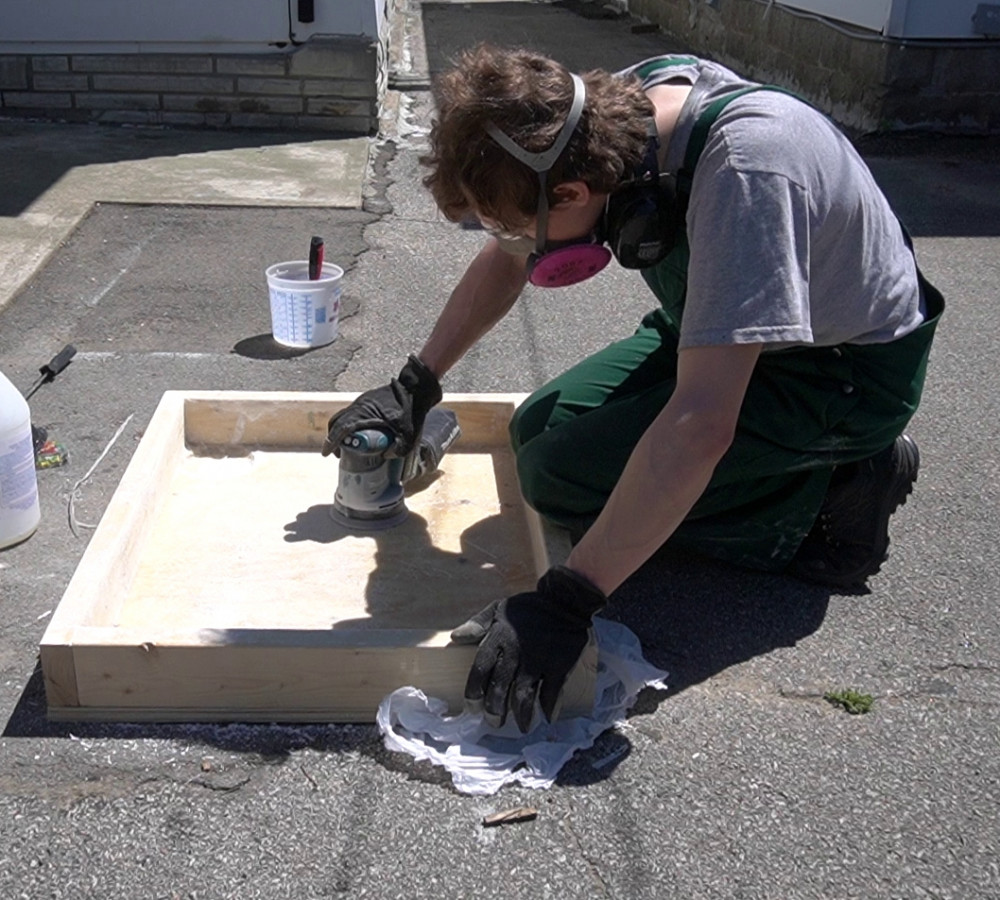
If you have bubbles anywhere sand them down. It's fine if you expose the underlying wood, you just don't want any bubbles. The sanding should be done very thorougly. The nicer you prepare the surface, the nicer it'll look later on. Sanding creates a very fine dust of plastic and glass particles, so wearing a respirator mask and eye protection is mandatory.
Once everything is sanded down, wipe the pan thoroughly with a wet towel. Next, lay out the fibreglass webbing. You shouldn't need to make any cuts for the drain molds, it should stretch enough to fill them in. You may need one cut in each corner and fold one side under the other. A few pins to keep it on the rim can help with the alignment.
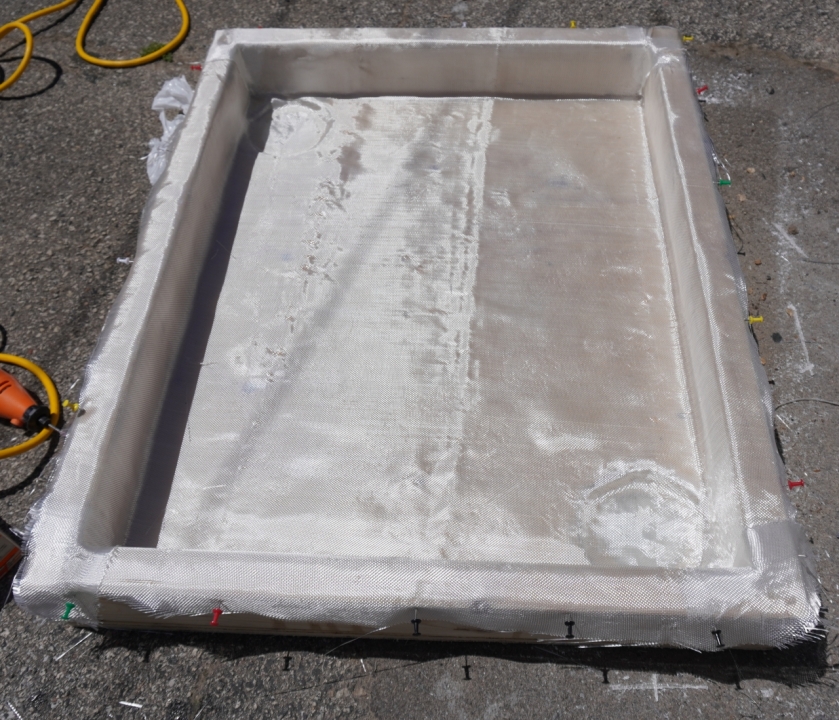
It's time for the second layer of epoxy now. You should use enough so you get an even and glossy bottom in the pan. Needless to say that the pan should sit level for this part, so the epoxy doesn't collect in one corner or the other. Be very thorough so you don't get any air bubbles in this layer.
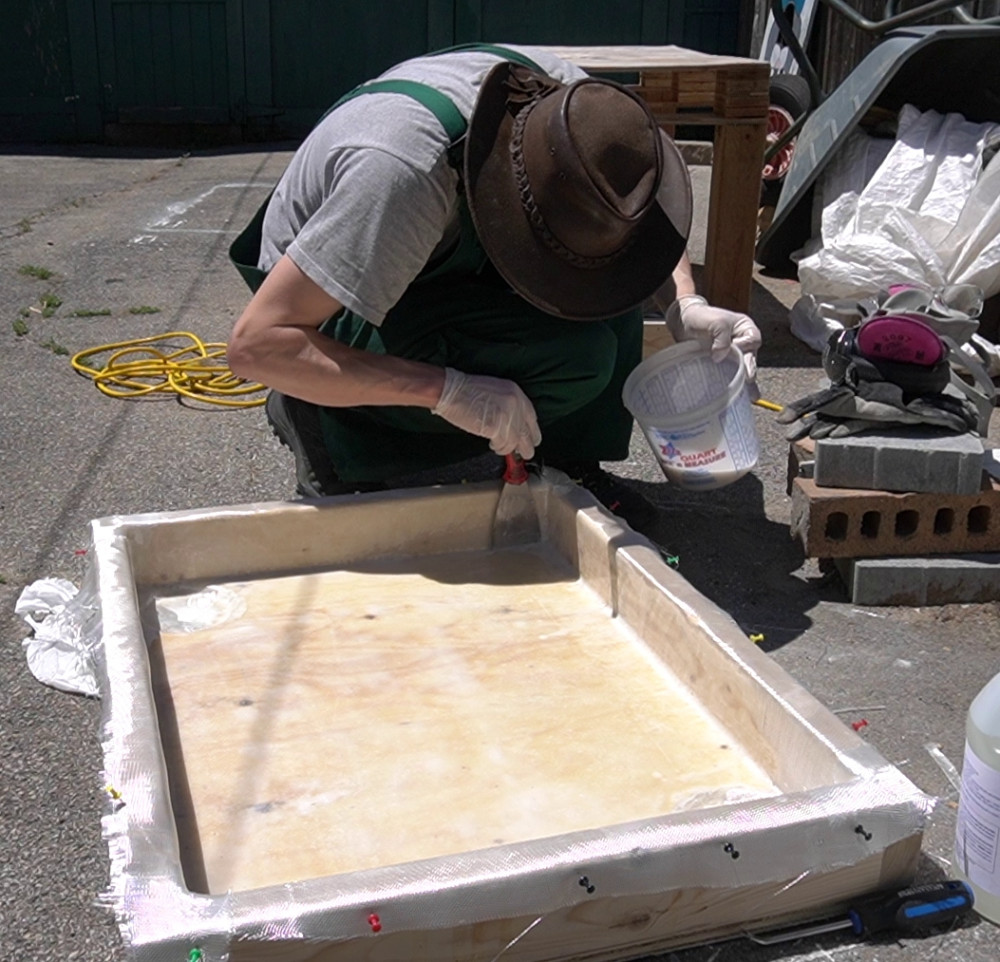
After curing this layer, cut off overhanging bits and run the sander with the 160 grid paper. Now, you'll want to get rid of everything that may stick out of your surface. Once complete, wipe down with a wet towel again. At this point, you can also cut out the holes for the drains again. If you're using a jigsaw, use a blade for cutting metal. A blade for wood is too rough and could crack the epoxy. Otherwise, your holesaw should also be fine for the job.
You're almost done, I promise! Apply the butyl tape (or silicone) to the underside of the drains and insert the drains into the holes. If you're using silicone, make sure it's not exessively squeezing out underneath. Give the pan a coat of paint (I've chosen white spraypaint here) and let it dry.
Last step is to mix up one more batch of resin and use the paintbrush for a last coat. Here you can also fill in the molds for the drains so there is no gap anymore between the pan and the drain. This will also seal the drains. Make sure you place plastic bags under each drain to catch excess epoxy.
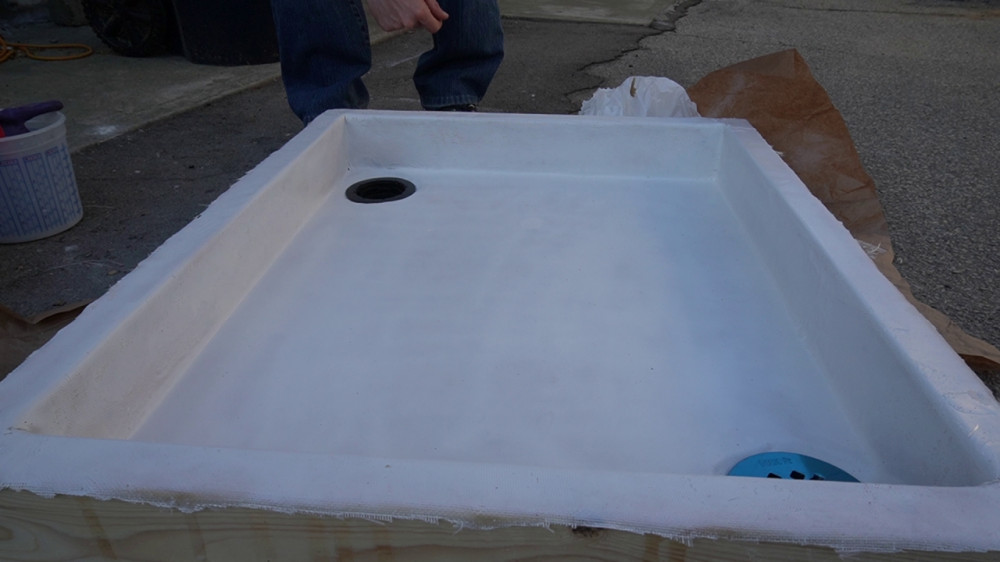
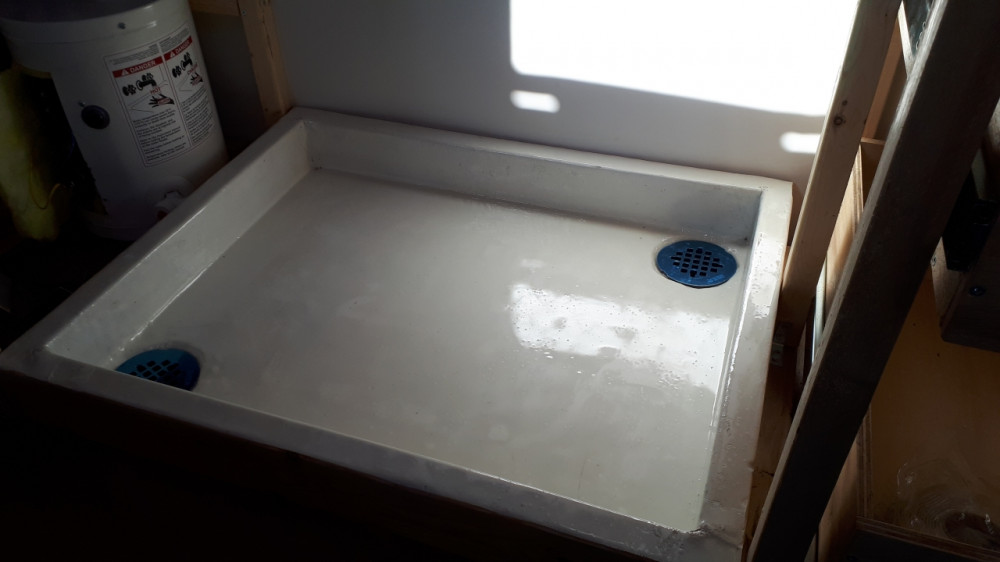
And there we have it! Our custom shower pan. This whole process took about 3 days, but each day only about 1 hour. It was a perfect side project: start each morning with an hour of shower pan and then you can do all your other chores.
Installing the Pan in the Van
We used a multitool to cut holes in our subfloor which matched the size of the drain outlets. Then, with a holesaw, we drilled into the actual floor boards so we could install the drain pipes.
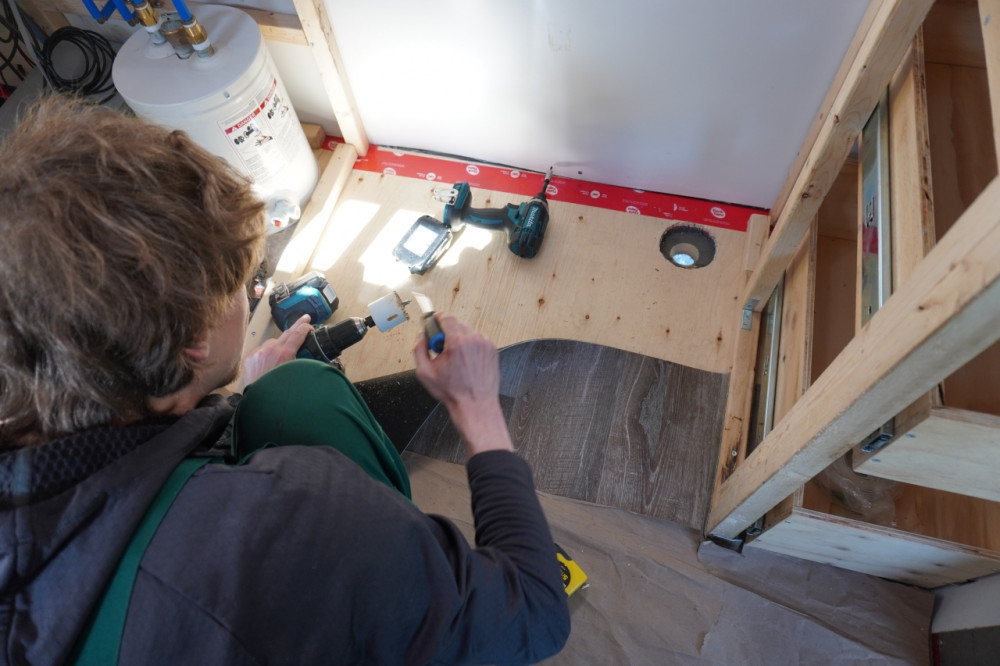
We had to add additional spacers as our subfloor was too shallow and so the pan was rocking on the drains.
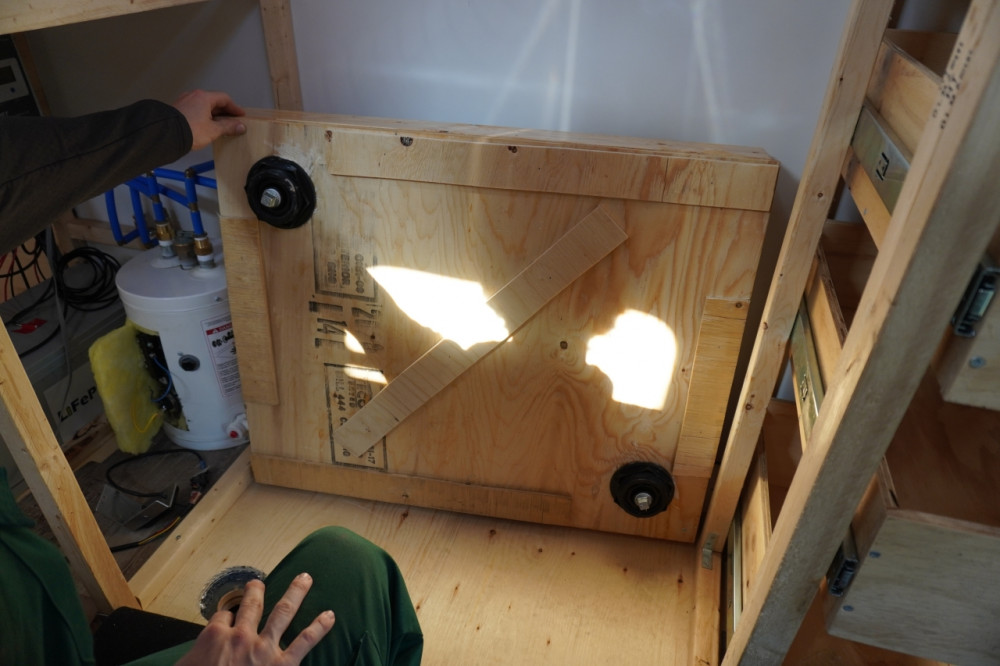
The drains in the shower pan are designed for 2 inch pipes which are rather wide. We used a few adapters to get down to 3/4 inch fittings (go to your local hardware store and play lego mix-n-match in the plumbing aisle). With those, we can build two siphons to prevent smells from the gray water tank. As you can see, I plugged the drains to test for leaks—nowhere was water to be seen, which means we did a good job.
If we are on crown land we can dump the water directly and don't need to collect it. We are using biodegradable soap so there is no harm to nature. Otherwise, we will collect our used water in a small grey water tank that we can empty at a dump station.
Stay tuned for the second part, where we'll explain how we set up our hot water supply and how we feed it into the shower.
See you on the road to pitches!
Moritz & Sachiko
Skye
Kerry Hall
Mary E McSweeney
Moritz
Michell
Jackie