Modified Water Heater for Battery Use & May Update
In the first part, we went over building our own custom shower pan to fit exactly the way we needed it while saving significantly on cost. In this post, we'll go over:
- how to get hot water without using a propane heater,
- how to feed the water into the shower,
- how to measure our water consumption, and;
- a quick recap of how May's financials went!
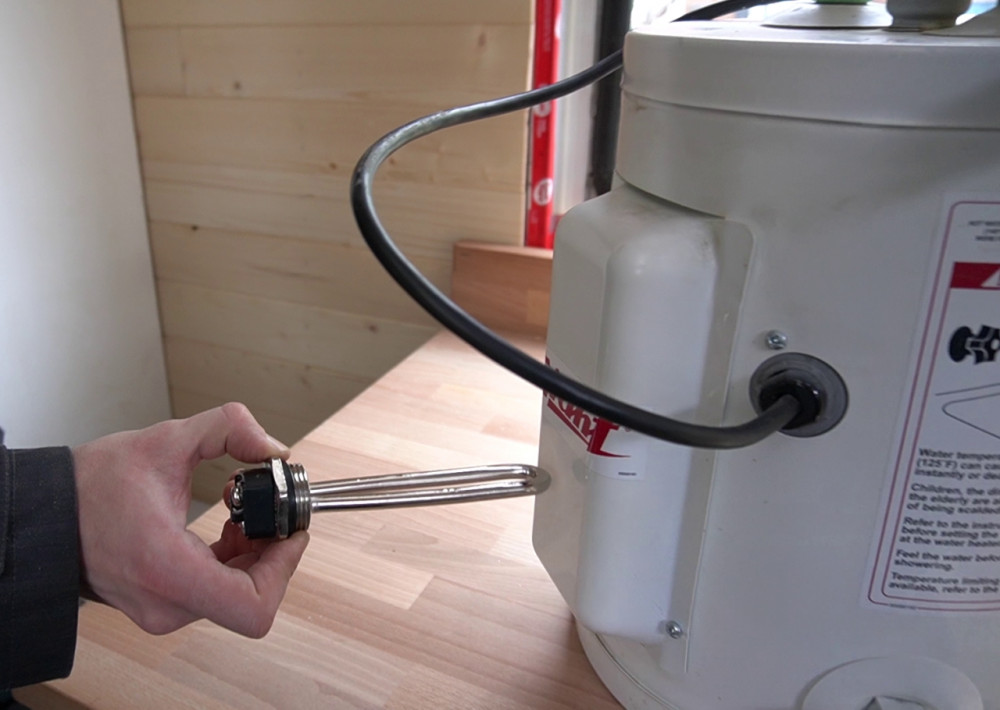
We've modified a 10 L water heater to run directly on our battery. This saves losses we'd otherwise have from our inverter and it also keeps the size of our inverter low.
How to Modify an Electrical Water Heater
A good shower needs hot water. At least if you're a Warmduscher (German: someone who only takes hot showers, English: a wimp) like I am. In the preamble you've already read that we modified a small 10 L water heater to run on our 24 V system, so you're probably curious now how this all works.
And yes, of course you can also modify it to run off 12 V.
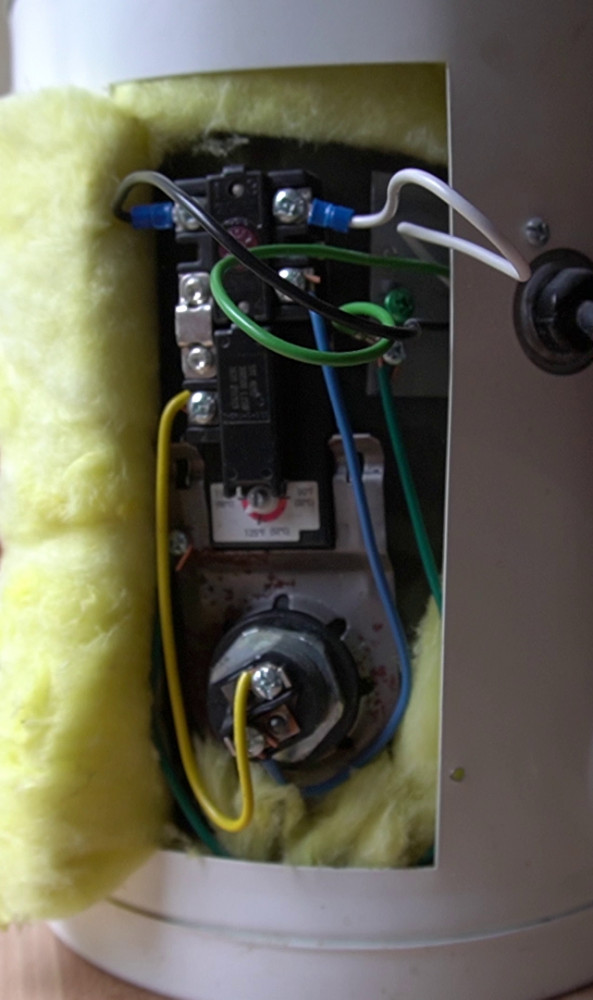
Although we had debated using a propane heater, we settled on a Giant 2 Gal electric heater, which is a less expensive brand of Rheem heaters. They sell for about $300 new, but if you look around for used ones, you can find them for about $80. On-demand propane heaters start at around $250 new.
Here is how much we spent:
- $80 - water heater
- $35 - 24 V 600 W heating element (12 V version on Amazon)
- $45 - plumbing hardware and pipes
- $20 - supplies and project-specific tools
- $30 - automatic water mixer
The approximate cost of materials totaled $210:
Electrical Water Heater Schematics
All of these heaters are built similarly. The electric power is fed through a temperature switch that limits the maximum temperature of the device. This is a safety feature to prevent it from overheating in case the thermostat fails. The power then goes through the thermostat that turns on the heating element until the desired temperature is reached.
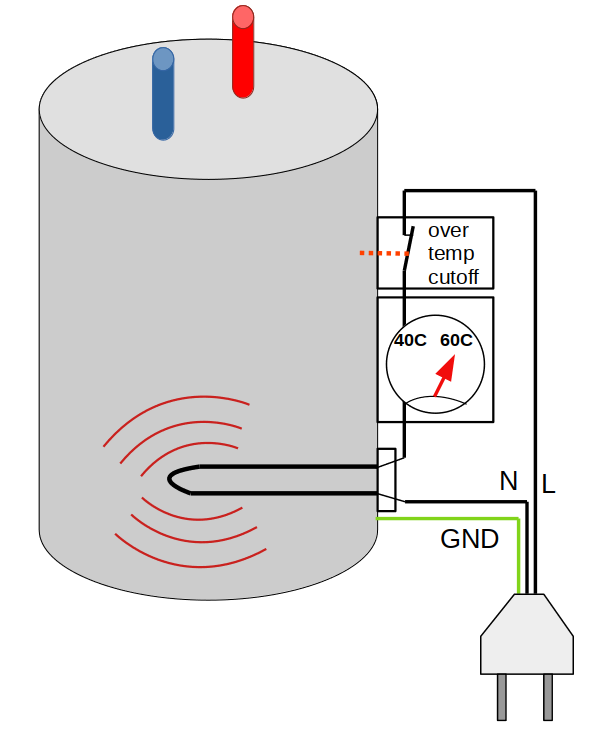
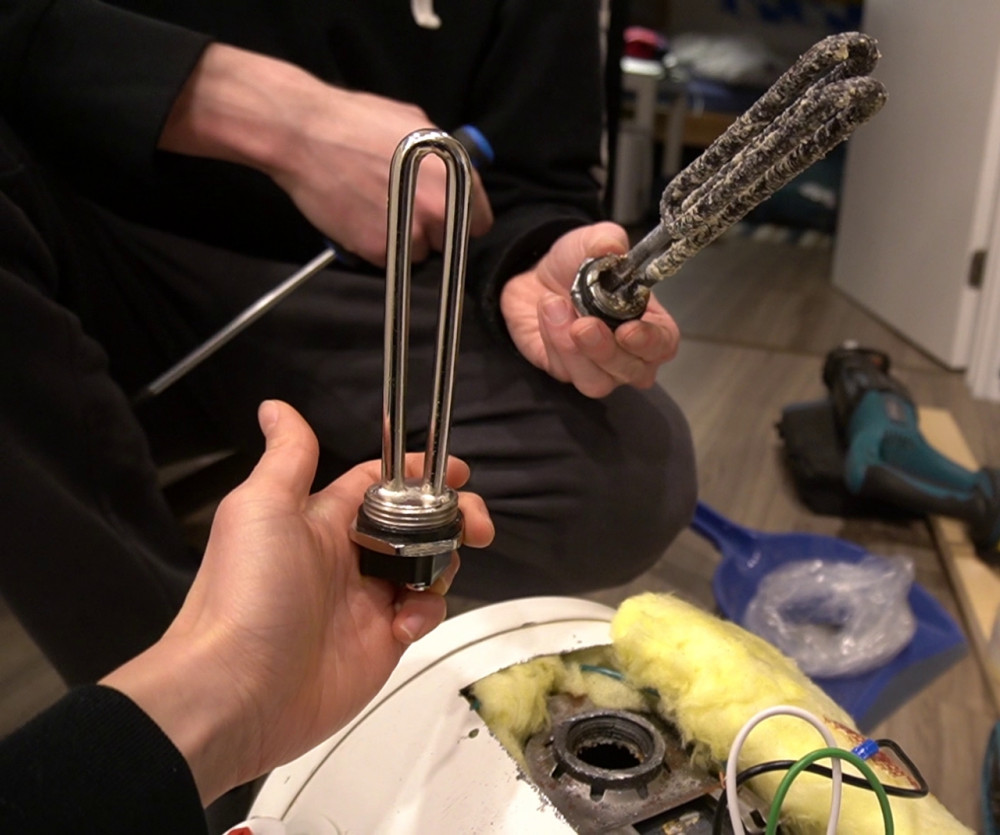
The heating element is a standardized piece which can be replaced with some effort. There are a few sellers online which have heating elements running on DC and Voltages ranging from 12 V up to 48 V.
We purchased an element for 24 V, producing 600 W of heat. This should heat up our 10 L tank in about 30 to 40 minutes. You cannot just switch the heating element and call it a day however. The reason lies in the increased current of the new element.
The heater comes equipped with a 1400 W heating element. The current that goes through the element is easily calculated by the formula
I = P / U: 1400 W / 120 V = 11.7 A
We switched to a heating element of 600 W at 24 V, so the current is more than double:
600 W / 24 V = 25 A
Another effect you need to consider is increased arcing when switching DC currents. In the previous blog post about running a fridge off-grid, we talked a bit about AC currents. The takeaway in AC circuits is that in every instance, the current goes down to 0 A at some point.
In a DC circuit, you have a constant current. If you turn off a switch, the current will try to continue to flow and you will see a bright flash (called an arc) in the switch. Because the current never reaches 0, the arc can prevail for an extended period of time and as you might know, arcs are very hot. Over time, they will just burn out the contacts of your switch.
So if you replace the AC heating element with a DC element and you increase the current, you have to be weary of increased abrasion of your switches. But there is rescue at hand!
We added a transistor, which is an electronic switch. This removes the mechanical switching element and hence, there will also be no arcing. Here's a circuit of how to hook everything up.
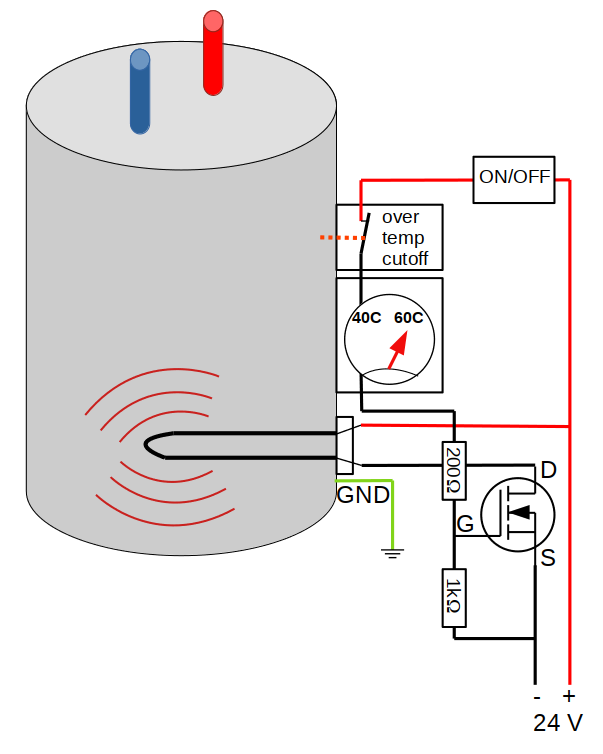
The power still enters through the temperature switch and the thermostat, but we also run it to the heating element. When it exits at the other side of the heating element it goes into our semiconductor, a MOSFET (IRF40B207) which is capable of switching 60 A of DC current with ease. This MOSFET closes the circuit with the negative wire when it receives a signal from the thermostat. There are two resistors which are necessary to charge and discharge the gate (G) of the transistor.
The ON/OFF switch is another relay contact, so we can turn on the heater from our central control system. This will make sure it doesn't turn on when the battery is too low, but we can also program it to prepare a warm shower for a certain time of the day. For example if we want to shower in the morning it could start heating up the water while we're still in bed, or start it 40 minutes before we expect to be back from our climbing adventures.
Also keep in mind that you will need thicker wire to transport the 25 A of current. You should use at least 3.5 mm2 (12 AWG) copper wire. Of course you'll also need to add a fuse which is not shown in the circuit.
Installing a 24 V Heating Element
Removing the heating element was challenging.
We didn't have a proper wrench (you need a 2 inch socket) and first attempted to go at it with a regular wrench. I had to call in for back-up, but loosening the screw was impossible.
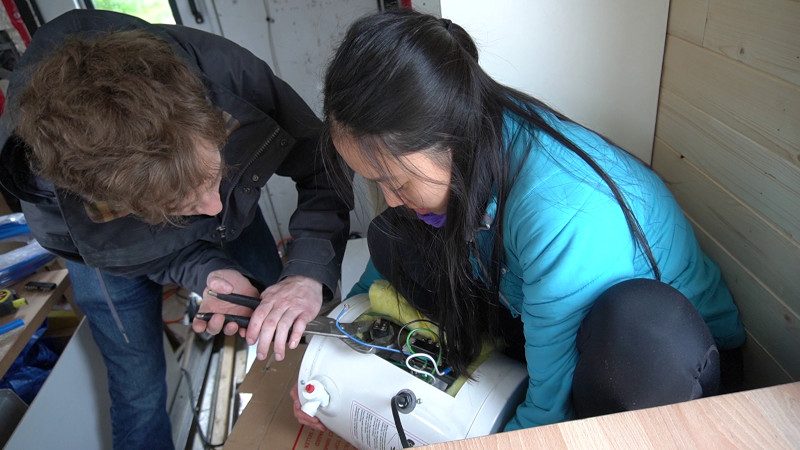
Next, we bought a cheap socket from the hardware store. Although the socket fit perfectly, the rod that came with the package was way too thin. When I thought the screw had finally loosened, I was sorely disappointed when I unclasped my hand and saw the bent rod. We eventually resorted to drilling a hole into the heating element (Moritz's idea), then sawed a small slot just into the threads of the heater tank (Sachiko's idea). With a multitool (Sachiko's idea again), I extended the slot all the way out so the heating element could release some of its friction against the tank's threads. This, finally, let it come free.
Total effort? Two weekends. (Sigh, I know.)
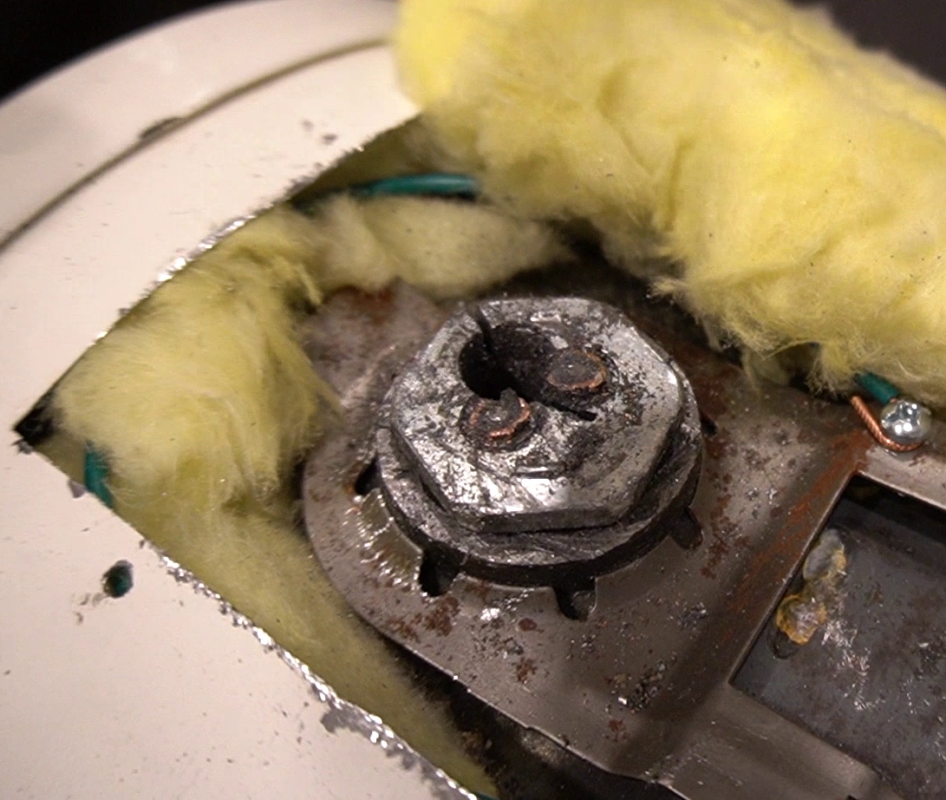
If you've bought a used tank, take the opportunity to clean out all the minerals and sand that will have collected in the tank. This tank was in use for 6 months according to the seller, but you can see how many minerals have accumulated.
Putting it All Together
With a limited hot water supply (and water supply in general) it is important not to lose water when trying to dial in the right temperature. We decided to get an automatic mixer where we can preselect the temperature and only turn the shower on and off.
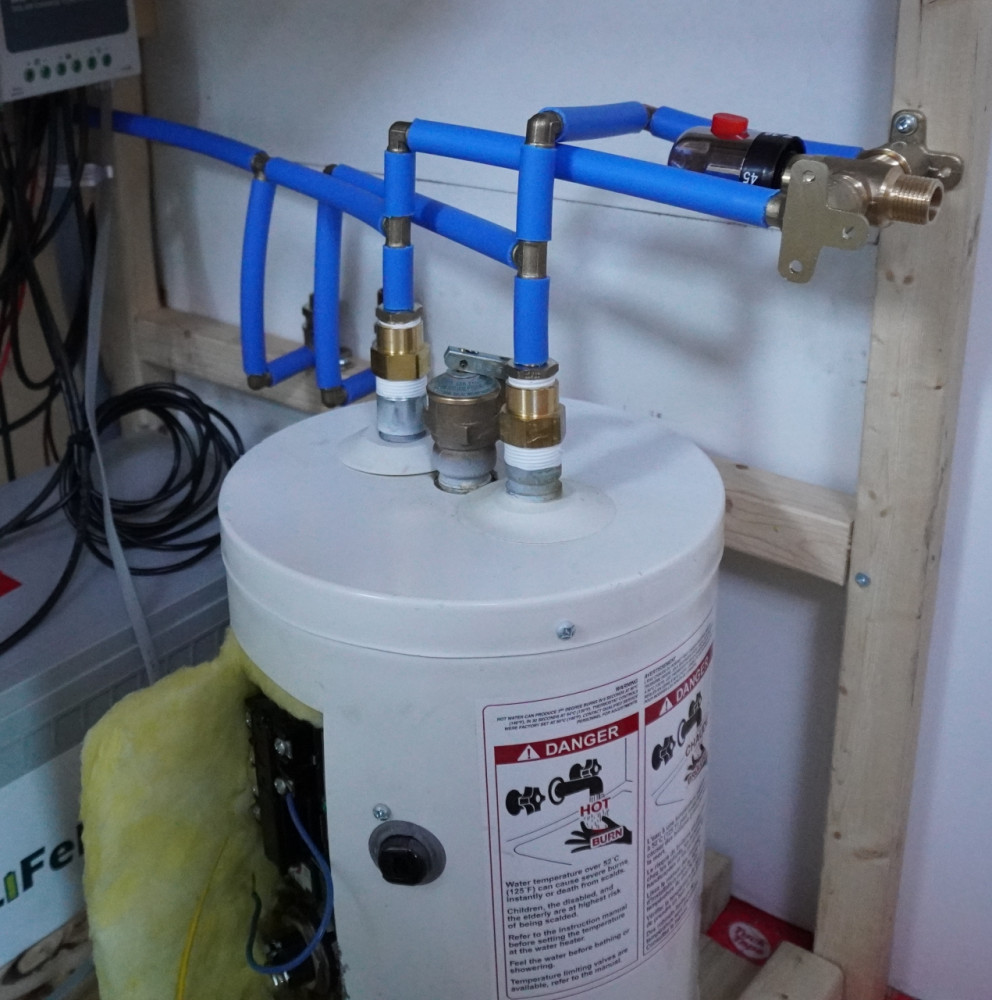
What looks a bit chaotic is not very hard. The cold water gets fed into the outlets for our kitchen tap, then feeds into the hot water tank and branches off to the automatic mixer. From the heater outlet we branch into the kitchen tap and into the shower mixer.
Finally, we'll need a way to measure how much water we have left. There are devices out there that can measure the water level via ultrasound or with a few contacts in the water. Our plan is much simpler: we're just gonna measure the flow and count how much water we've consumed. Of course this requires a manual reset after each filling of the tank, but we will get exact measurements of how much water we use each day.
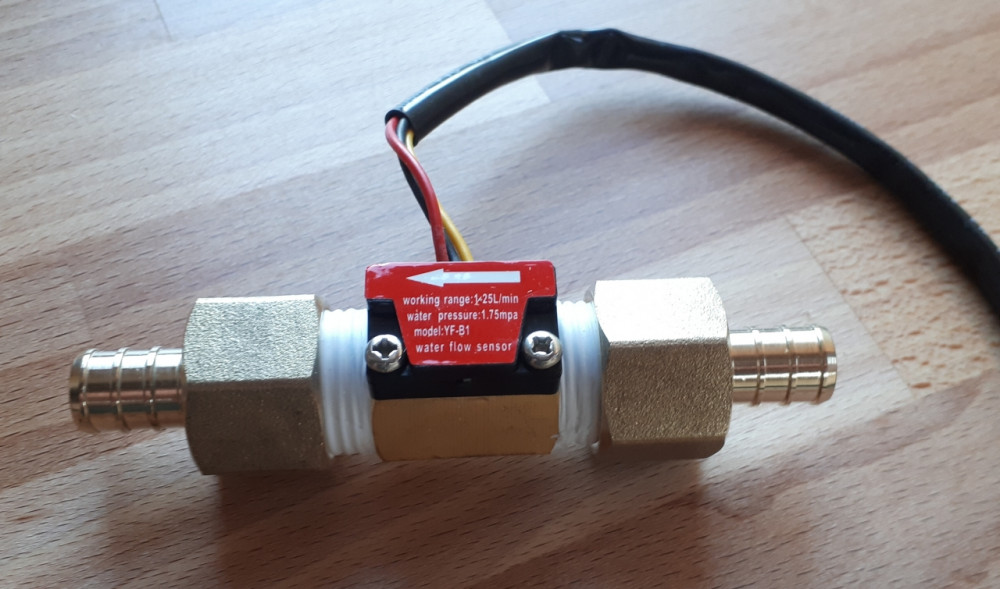
This flow sensor will be hooked up to our central control system which has yet to be built, but I have a plan in place. Something for a future blog post!
May Financials
Sachiko reporting here with your reforecast for the month. For the TL;DR, we're perpetually over budget.
Originally, we budgeted $22,020 for everything, from van to build.
Currently, we are sitting at a total spend of $23,945 with $4,082 of those dollars unbudgeted for.

Last month, our expected total cost was $25,846. This month, it's risen to $26,311. We have 11 months left in our build, so at this rate, we'll likely add on another $5,000 or so, plus the budgeted spend of $2,500.
Will we break $30,000?! Start placing your bets.
In May, we spent $1,206 and some highlights:
- $336 - Plumbing (faucet ended up costing $100, but it's really nice!)
- $332 - Drawers (coming soon in a future post!)
- $155 - Electrical (lights, wire lugs, etc.)
- $117 - Vinyl floor
As certain parts of our build near completion, our spending will naturally taper off. We are taking the last two weeks of June off and will be hunkering down to work on our ceiling and shower walls!